- Contact Us
-

choose your language

Knowledge Base
How to move a certificate from Microsoft IIS 7.0 to Microsoft IIS 7.0
Solution
To move an SSL certificate from Microsoft IIS 7.0 to Microsoft IIS 7.0 server, perform the following steps.
Step 1: Export certificate in IIS 7.0
- Start > Run
- Type in MMC and click OK
- Go into the File Tab > select Add/Remove Snap-in
- Click on Certificates and click on Add
- Select Computer Account > Click Next
- Select Local Computer > Click Finish
- Click OK to close the Add/Remove Snap-in window.
- Double click on Certificates (Local Computer) in the center window.
- Double click on the Personal folder, and then on Certificates.
- Right Click on the Certificate you would like to backup and choose > ALL TASKS > Export
- Follow the Certificate Export Wizard to backup your certificate to a .pfx file.
- Choose Yes, export the private key
- Choose to Include all certificates in certificate path if possible. (do NOT select the delete Private Key option)
- Enter a password you will remember
- Choose to save file on a set location
- Click Finish
- You will receive a message > "The export was successful." > Click OK
- The .pfx file backup is now saved in the location you selected
Step 2: Import certificate (.pfx) file using Microsoft Management Console (MMC) Snap-in for managing certificates
- With the MMC and the Certificates snap-in open, double click on Certificates (Local Computer) in the center window.
- Right click on the Personal Certificates Store (folder)
- Choose > ALL TASKS > Import
- Follow the Certificate Import Wizard to import your .pfx file. You will need to browse for .pfx file.
- Enter the password that was used when exporting the certificate to a .pfx file.
- If desired, check the box to Mark this key as exportable.
- When prompted, choose to automatically place the certificates in the certificate store based on the type of the certificate.
- Click Finish to close the certificate wizard.
- Close the MMC console. In the case that you are prompted, it is not necessary to save the changes made to the MMC console.
Step 3: Binding certificate to the web site
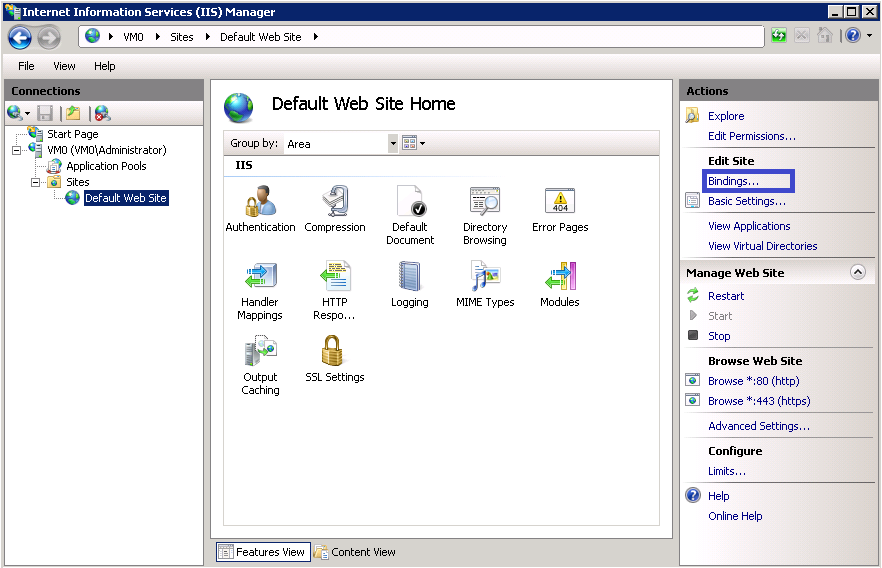
- Click Start > Administrative Tools > Internet Information Services (IIS) Manager
- Browse to your server name > Sites > Your SSL-based site
- In the Actions pane, click Bindings...
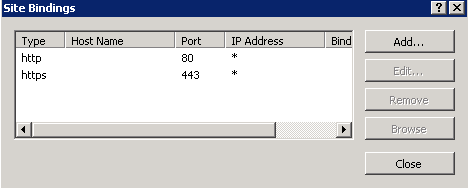
- In the Site Bindings window, If there is no existing https binding, choose Add and change Type from HTTP to HTTPS.
Note: If there is already a https binding, select it and click Edit.
- From the SSL Certificate drop-down, Select the Friendly Name for the certificate that will be used for this site.
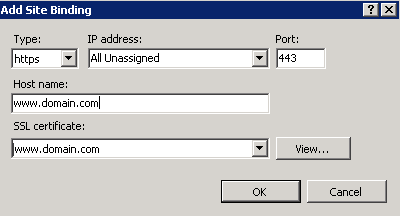
- Click OK
Step 4: Verify certificate installation
- Verify your installation with the SSL Checker
- In some cases, you may need to Stop and Start your Web server prior to any testing.
Note: In some cases, the changes may not take place after restarting IIS Services and a reboot is needed.
Additional Notes:
If you do not specify an IP address when installing your SSL Certificate, the same ID will be used for all virtual servers created on the system.
If you are hosting multiple sites on a single server, you can specify that the ID only be used for a particular server IP address.
Microsoft Support
For more information, contact Microsoft.
-

The most-trusted global provider of high-assurance TLS/SSL, PKI, IoT and signing solutions.
-


-
© 2022-2024, DigiCert, Inc. All rights reserved.
Cookie Settings
