Knowledge Base
Create a Billing Group
Constellix provides account administrators with the ability to add contact groups for ease of management. Groups are helpful for customizing billing notifications based on events. This tutorial will walk you through the process of configuring contact groups.
Note: Visit our Constellix Billing FAQ for common questions related to our Billing Console features.
Prerequisites
- A domain or Sonar check has been added to your account
- You want one or more team members to receive billing notifications for your Constellix account
- You want to customize billing events that trigger notifications for certain billing contacts
Note: For help adding a contact, visit our Create a Billing Contact tutorial.
How to Add a Billing Group in Constellix
1. Navigate to Manage Contacts and Groups
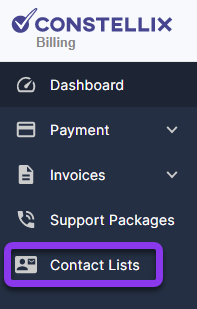
After logging into Constellix, navigate to the Billing portal. Select Contact Lists in the menu on the left-hand side of the dashboard page.

You should now be on the Manage Contacts and Groups page.
2. Add a Group
To add a contact, select the +Add Group button.

3. Enter Group Details
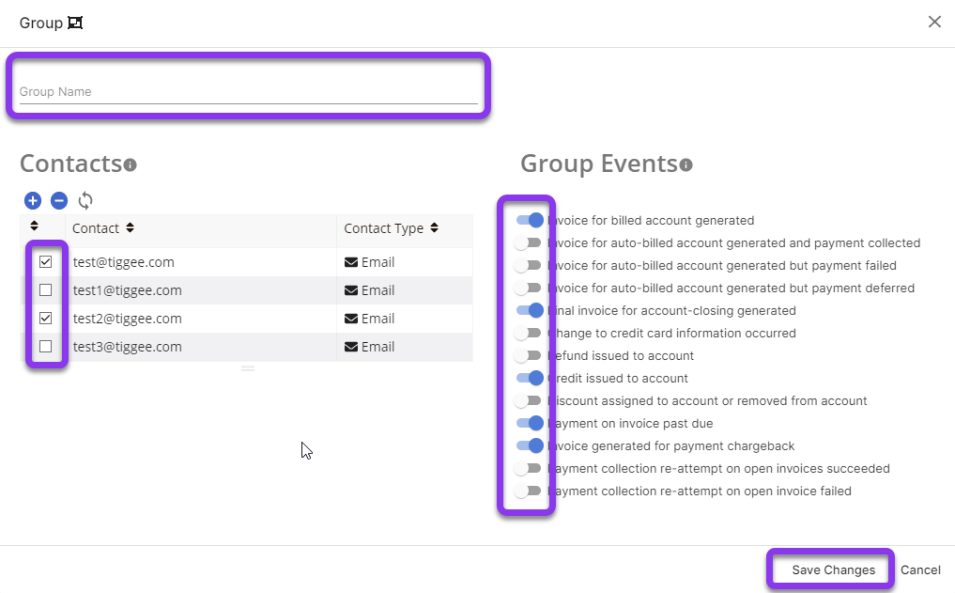
In the Group popup window, specify a group name, choose the contacts you want to be added to this specific group, and select which events will trigger notifications for the group. Click Save Changes at the bottom right of the window to complete.

Note: Group events can be removed or added by the account administrator at any time.
After saving changes, your new group will be added to the Group column. As shown below, you will now see the group you added, how many contacts are in the group (contact icon), and how many events are configured (blue alert icon).

If you need to create additional groups, repeat steps 2 and 3.
Note: To make changes to your Group, visit our Edit Billing Group tutorial.
Visit our website for more information on our services and features.

