Knowledge Base
Setting Default Permissions
This tutorial guides you through the process of setting default permissions for all new users in the Constellix DNS portal. There are several customization options available, including IP Filter, GeoProximity, Pool, and Domain-specific permissions. You have the flexibility of choosing the following privileges as default: none, read-only, read/commit, read/write, or read/write/commit.
Common Use Case for Setting Default Permissions
Setting default permissions lets account administrators quickly and easily add users with certain privileges set automatically.
Note: These settings will be applied to all new users added to the management console. For customization options for each individual user, visit our Permissions tutorials.
Prerequisites
- You have a domain already added to your Constellix account
- At least one user has been added to your account
Note: For help with creating users, visit our Adding Sub-users tutorial.
How to Configure Default Permissions for Your Domain
1. Navigate to Configuration
After logging in to your Constellix account, navigate to the DNS portal and click on Configuration in the left-hand menu to expand options. Next, select the option for Users.

2. Default Permissions
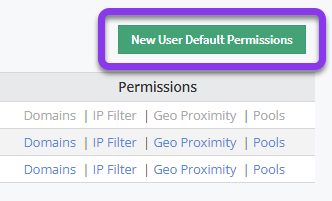
To customize your default permissions, click on the green New User Default Permissions button.

3. Set New User Default Permissions
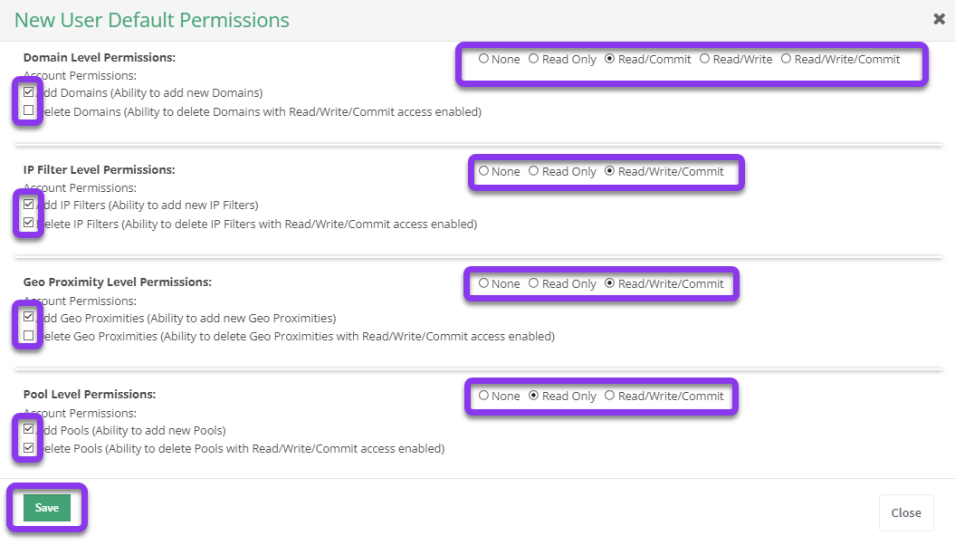
In the New User Default Permissions window, you can choose which permissions will be included in your default settings by checking or unchecking the box beside each option on the left.
To set access privileges, click the radio button beside the options you want to make the default for all newly added users.
Note: This will not affect permissions for current users.
After you have chosen all options for your default permissions, click the green Save button.
Visit our website for more information on our services and features.


