
Knowledge Base
Apply IP Filter to a domain
Once you have created an IP Filter rule, you need to apply it to a domain or a record. If the IP filter is applicable, you can apply it across multiple domains and DNS records. This tutorial will walk you through the process step-by-step.
For example purposes, we will be applying a filter to an A record, but the steps are the same for any record that supports IP filters (AAAA, CNAME, ANAME).
Prerequisites
- You have created or imported records for your domain or have a basic understanding of DNS records
- An IP filter rule has already been created for your domain
How to Apply an IP Rule in Constellix
1: Log in to the Constellix dashboard
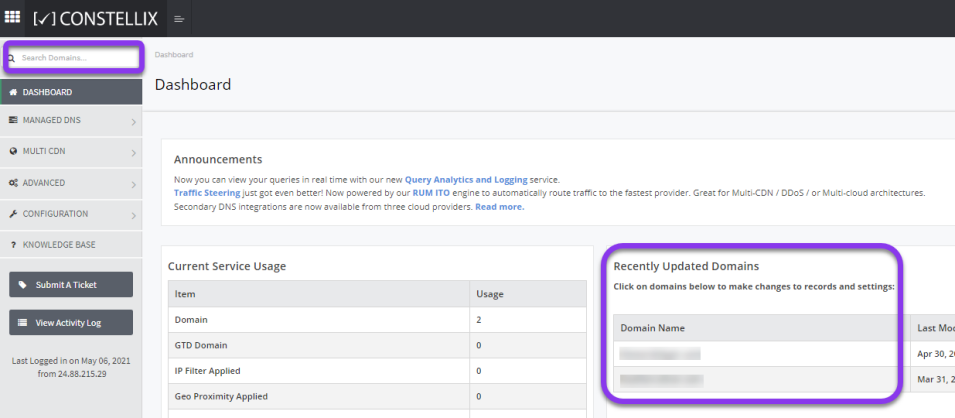
In the Constellix dashboard, select your domain from the Recently Updated Domains list or search for the domain in the top-left search bar.
2. Create a Record With World (Default) Setting
Before you can apply an IP filter to your domain, you need to create a record of the same type that has the World (Default) rule applied to it. As we are using an A record as an example, our World (Default) setting would also need to be set for an A record.
Note: If you try to apply a filter without first creating a record with World (Default) settings, you will receive the following error message:
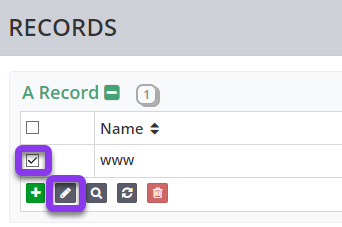
Select the A record you want to apply the IP filter to and click the gray edit icon.
3. Apply Filter
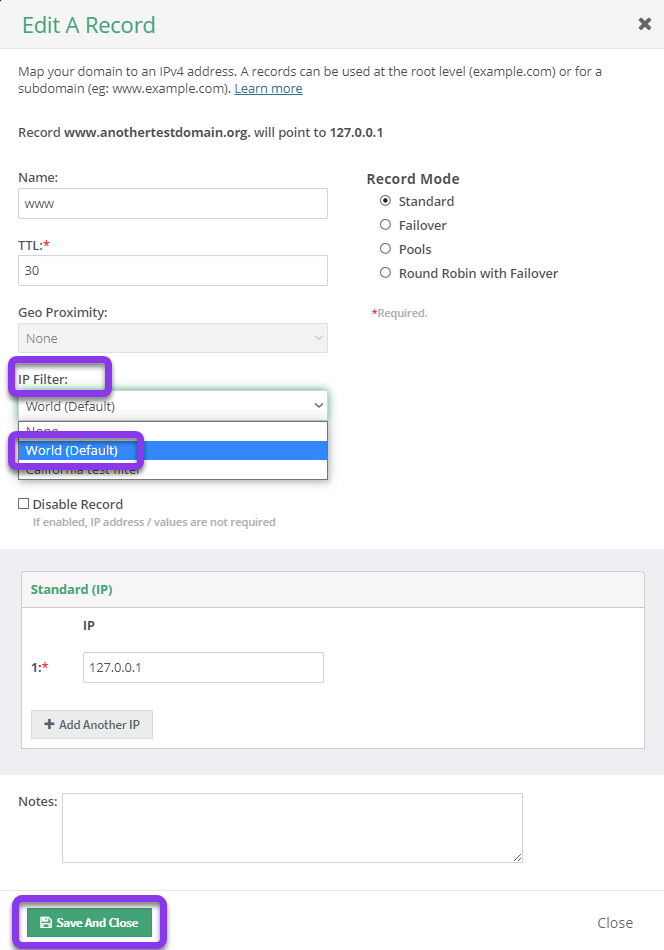
In the Edit A Record pop-up, click on the IP Filter option and select World (Default). If you are segmenting or filtering traffic to a specific server for your domain, then click the green Save and Close button to finish. If you are blocking traffic, complete step 4 before saving.
4. Blocking Traffic With IP Filters(optional)
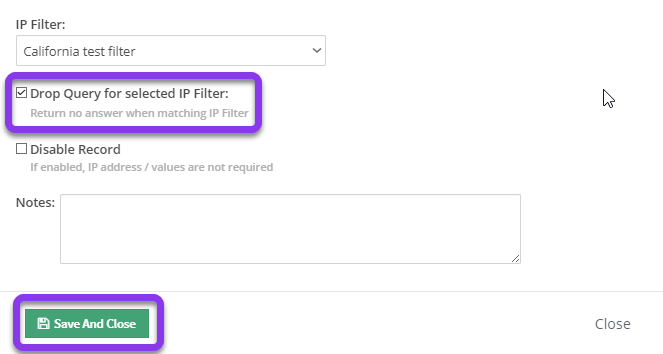
If you want to block traffic from the locations, ASNs, or subnets specified in your filter, check the box beside Drop Query for Selected IP Filter. As you will see, once you choose this option, the Standard IP section is no longer available. Any queries that match the filter’s criteria will be dropped and will not be able to access your system. Next, select Save and Close.
5. Commit Changes
After saving, you will be prompted to review and apply changes.

Tap “click here” to commit the change. If you need help with this step, visit our Committing Changes in Constellix DNS tutorial.
6. Apply Filter Rule
To apply the specific filter rule you previously created, repeat steps 2 through 4, except in step 3, choose the filter you made. Remember to click Drop Query for Selected IP Filter if you are blocking traffic, otherwise, tap Save after selecting your filter.
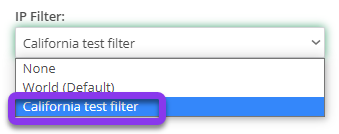
After you have applied your custom IP filter, you will need to repeat step 6 (Commit Changes), in order for your filter to take effect.
Visit our website for more information on our services and features.


