Knowledge Base
Create a Geo Proximity Rule
Geo Proximity rules allow system administrators to specify the location or the longitude & latitude of their hosted servers (data center locations). Once configured, the Constellix GeoIP engine will automatically calculate which server is closest to the end-querying client in real-time. This is possible because Constellix nameservers run on our globally distributed Anycast network. Geo Proximity can also be used with Failover and is highly customizable and scalable.
Common Use Cases for Creating Geo Proximity Rules
Geo Proximity rules are most commonly used for optimizing resolution accuracy and speeds. With the ability to configure rules based on precise geographic-specific information, end users will have the fastest possible connection and an enhanced overall experience when interacting with your domain.
Prerequisites
- A domain has already been added to your Contellix account
- Records have been created or imported for your domain
- You have longitude and latitude coordinates or location information for your hosted servers.
How to Configure Geo Proximity Rules in Constellix
1: Log in to the Constellix Dashboard
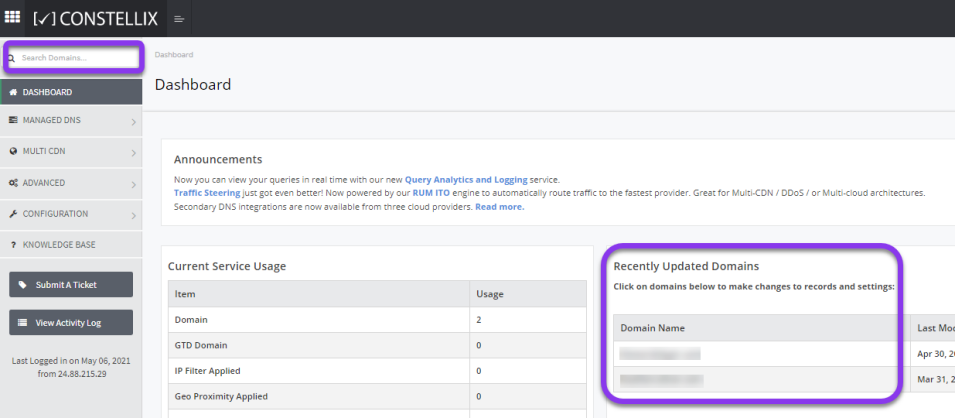
In the Constellix dashboard, select your domain from the Recently Updated Domains list or search for the domain in the top-left search bar.

Note: Options available may vary depending on the current configurations set for your domain.
2. Click Advanced and Select Geo Proximity
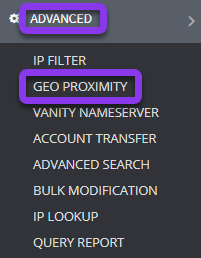
Once in the Dashboard, select Advanced in the left-hand sidebar menu. This will display a drop-down list of DNS configuration options. Select Geo Proximity from the drop-down menu.

3. Add Geo Proximity Rule
You should now be in the Geo Proximity dashboard. Click the green + Add GeoProximity button on the far right-hand side of the screen.

4. Configure Geo Proximity Rule
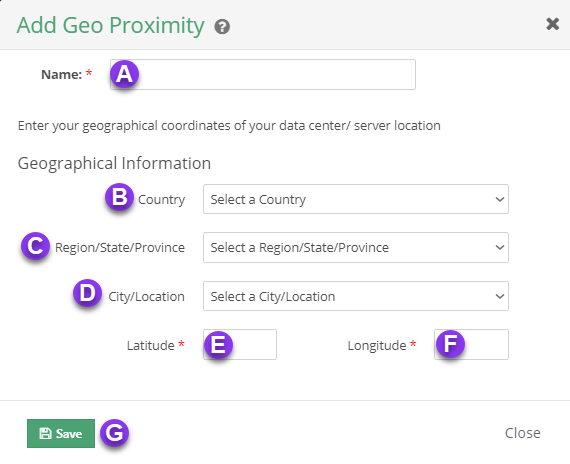
The Add Geo Proximity window should now be displayed. Fill out the following values to set and customize your rule:

a) Name: Use an identifiable name to label your Geo Proximity rule.
b) Country: Specify the country you want to apply this Geo Proximity rule to (you can scroll through the list or start typing a country name in the Country field).
c) Region/State/Province: Select the region, state, or province from the dropdown options for greater accuracy (optional).
d) City/Location: If you selected a region, state, or province, you can designate the rule to also apply to a city within your chosen area (optional).
e) Latitude: Specify the exact latitude coordinate of the location.
f) Longitude: Specify the exact longitude coordinate of the location.
Note: Latitude and longitude coordinates will populate automatically based on your selections, but you can manually change them to the precise coordinates of your server(s) location.
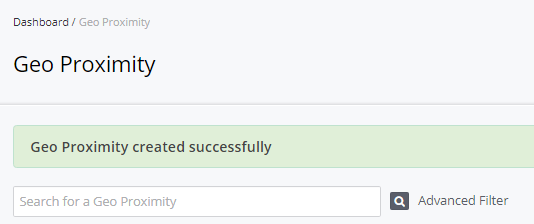
g) Save: Click the green Save button at the bottom left side of the pop-up window to complete your rule. Upon saving, you will see a green confirmation stating that you have successfully created a Geo Proximity rule.

Note: For help applying a Geo Proximity rule to your domain, visit our Using a Geo Proximity Rule in a Domain tutorial.
5. Apply Pool to Domain
Be sure to apply the pool(s) to your domain for your configuration to take effect. If you need help with this step, view this tutorial.
Visit our website for more information on our services and features.

