Knowledge Base
Delete a Geo Proximity Rule
Geo Proximity allows server information to be delivered based on the geographic location of your resources and users. With proximity-based routing, you can build your own content delivery network (CDN) by establishing routing policies. Geo Proximity automatically routes queries to the closest server to the end user within your content network.
Common Use Cases for Geo Proximity Rule Edits
Geo Proximity rules may need to be deleted if a new record configuration is required or if record cleanup is necessary. In some cases, they may just need to be edited to redefine parameters or enhance domain speeds. If you need assistance editing a rule, see our tutorial.
Note: In order to delete a Geo Proximity rule, you must first remove it from any domain(s) that it is applied to. Attempting to delete a Geo Proximity rule prior to removing it from the domain will result in the following error:
Note: If you no longer want to use GeoIP services, you can disable it. This will automatically remove any related GeoIP records applied to your domain, including Geo Proximity. When performing any type of record deletion, make absolutely sure that you have a new record already in place or have scheduled planned maintenance for your domain as deleting these records could result in downtime.
Prerequisites
- GeoIP has been enabled for your domain
- A Geo Proximity rule has been created and needs deleting
- You know which domain(s) are currently using the Geo Proximity Rule
Delete a Geo Proximity Rule
Once logged into your Constellix DNS dashboard, the following steps will guide you through the process of deleting a Geo Proximity rule that has been configured for your domain.
1. Select Domain
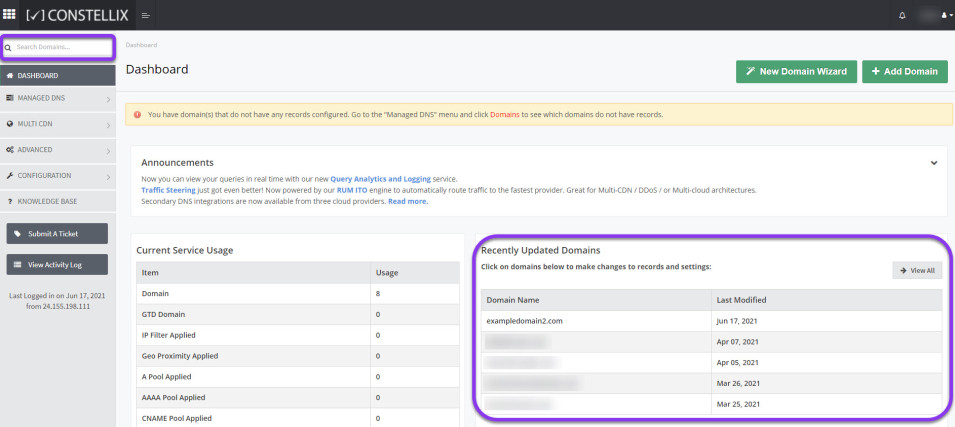
To delete a Geo Proximity rule, it must first be removed from the domain’s record that it is applied to. In the Constellix DNS dashboard, select the related domain from the Recently Updated Domains list. Optionally, you can locate the domain using the search bar on the upper left.
Note: Options available may vary depending on the current configurations set for your domain.
2. Edit the Record
To remove the Geo Proximity rule from the domain, check the boxes next to the related records and click the red trash can icon.

3. Remove Geo Proximity Rule from Domain
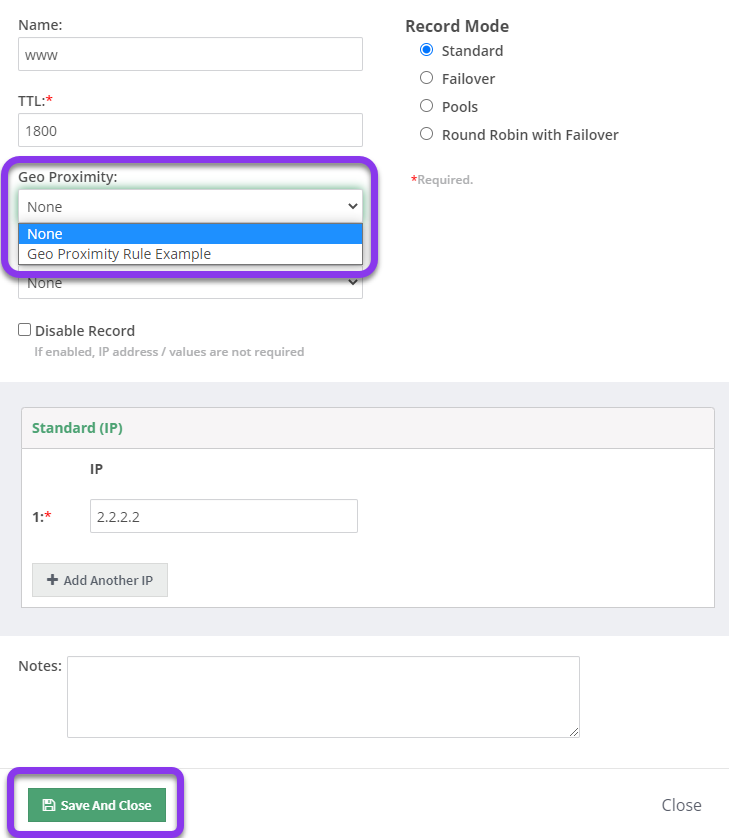
On the Edit A Record page that pops up, change the Geo Proximity rule to None (or select a different rule if applicable) and click Save And Close.

If the rule is applied to multiple domains, repeat this process for each.
4. Review and Apply Changes
Review and apply changes. Tap “click here” to commit the change. If you need help with this step, visit our Committing Changes in Constellix DNS tutorial.

You will receive a message confirming the changes.

5. Navigate to Geo Proximity
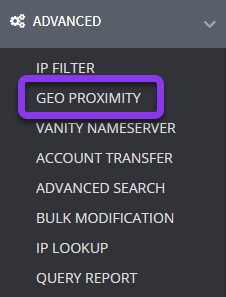
Once the Geo Proximity rule is removed from the domain(s), it can then be deleted. In the Advanced dropdown from the left menu, select Geo Proximity.

6. Select Geo Proximity Rule
Check the box next to the Geo Proximity rule you want to delete and then click on the green Delete GeoProximity button.

7. Confirm Deletion
In the confirmation popup window, click on OK to proceed with the Geo Proximity rule deletion or click Close to cancel.

Once the changes are saved, you will see a green confirmation message stating that the Geo Proximity rule was deleted successfully. Additionally, changes can be confirmed in the Geo Proximity rule list.

Visit our website for more information on our services and features.


