
Knowledge Base
How to Apply or Remove Tags From Domains
Overview
Constellix allows you to create tags for your domains to help keep them organized. This tutorial walks you through the process of applying or removing tags for single domains or in bulk.
Prerequisites
- At least one domain has been added to your account
- You have already created at least one tag
Note: If you need help creating a tag, please visit our tutorial: How to Add, Edit, and Remove Domain Tags.
How to Apply or Remove Tags for a Single Domain
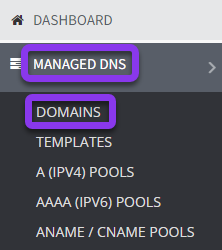
- Navigate to Managed DNS > Domains
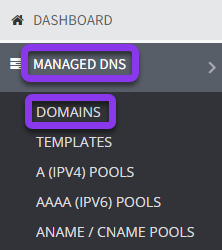
After logging into the Constellix DNS dashboard, click Managed DNS in the left sidebar menu to expand options, then select the option for Domains.
- Apply Tag to Domain (single domain)
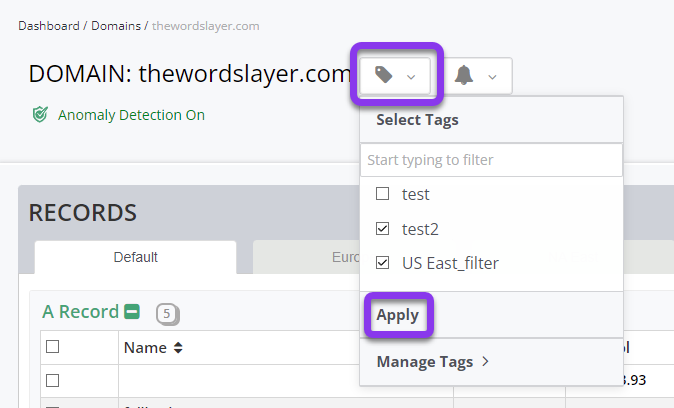
To add a tag to just one domain, click on the desired domain name and then click the tag icon beside the domain name at the top of the page.
Next, check the boxes beside the tag(s) you want to be applied to the domain and then click Apply.
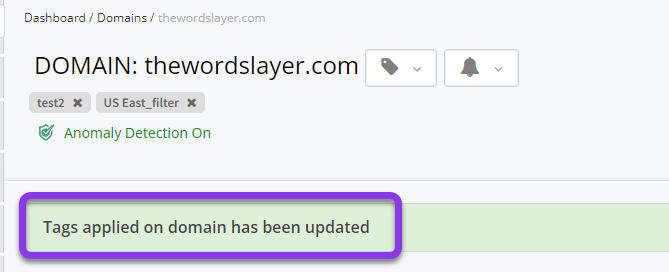
After clicking Apply, you will see a notification confirming the tag(s) was applied successfully.
- Apply Tags in Bulk
To apply tags to multiple domains at once, navigate to Managed DNS > Domains.
- Choose Domains and Apply
Next, check the box beside the domains you want to apply tags to, click the green Advanced Options button on the right-hand side of the screen, and then select the option for Apply Tags from the dropdown menu.

- Select Tags to Apply
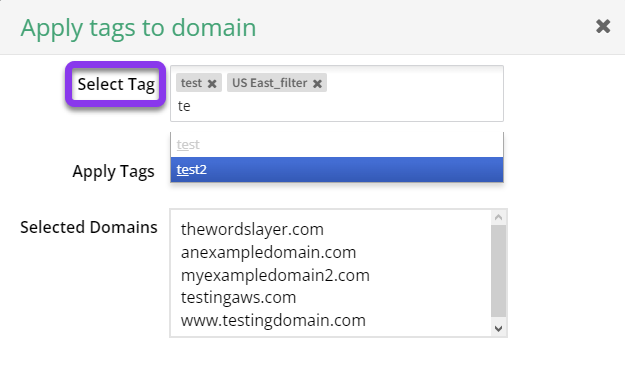
In the Apply tags to domain window, start typing the name of your tag in the Select Tag field. Click on the name of the tag you want to add. Repeat until you have chosen all the tags you want to apply to the selected domains.
Next, make sure the radio button beside Apply Tags is selected, and then click the green Save button.
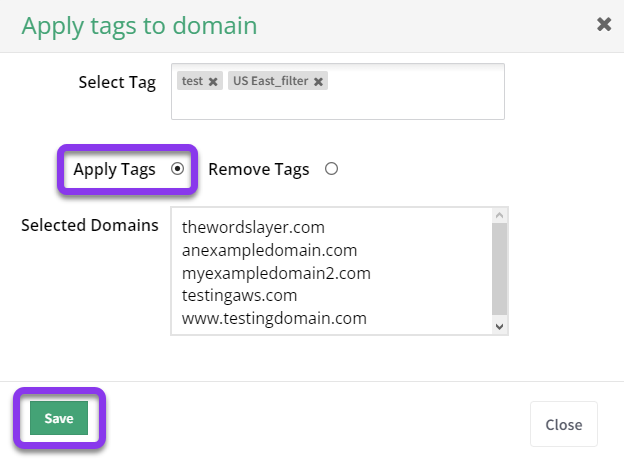
Once completed, you will see a message confirming that the tags were applied to your domains successfully.
- Remove Tags
To remove tags in bulk, repeat step 9, but make sure that the radio button for Remove Tags is selected.
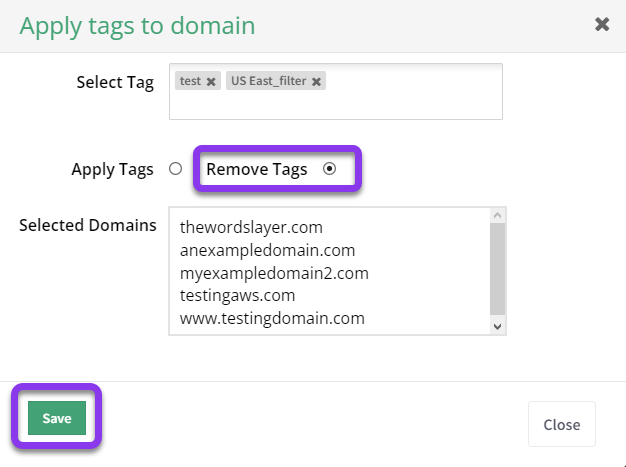
Once completed, you will see a message confirming that the tags were removed from your domains successfully.
Visit our website for more information on our services and features.

