
Knowledge Base
Update an IP Filter Rule
Overview
IP Filters afford you more control over your domain’s web traffic based on geo-specific rules. In Constellix, you can create and update IP filters as needed. In this tutorial, we will walk you through how to update an IP filter rule.
Note: Any change made to an IP filter will affect ALL domains that use this specific filter. If you want them to be domain-specific, you could name the filters according to the domain that will be using them so they will be easier to differentiate.
Common Use Case for Changing IP Filter Rules
Updating IP Filters may be necessary if you notice web traffic patterns have shifted or if your domain is getting more traffic from certain areas and you want to optimize the end-user experience. It may also be necessary to update blocked regions, ASNs, or IP subnets if they are no longer a threat.
Prerequisites
- You have created an IP Filter for your domain that needs to be changed or updated
- You have all necessary IP, host, ASN, or IP/netmask information
How to Change IP Filter Rules in Constellix
- Log into Constellix and Select Domain
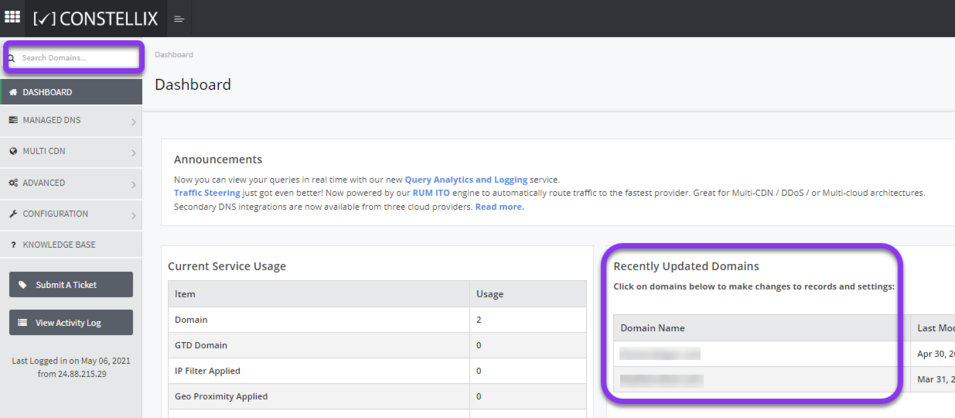
Log into Constellix. Once in the DNS dashboard, select your domain from the Recently Updated Domains list or search for the domain in the top-left search bar.
- Navigate to IP Filters
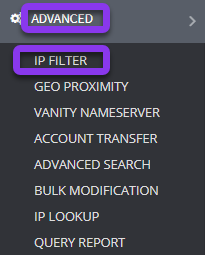
Once logged in to the Constellix DNS dashboard, click on Advanced in the left-hand menu and then select the option for IP Filter.
- Select Filter to Edit
Select the IP filter you want to update by selecting the gray edit icon on the far right-hand side of the IP Filters page (the World Default filter cannot be modified).

- Edit Filter Information
The Edit IP Filter pop-up window should now be on your screen You can now make adjustments by following the instructions below.
Note: To remove a previous rule from the filter, just click the gray trash can icon next to the rule you want to delete.
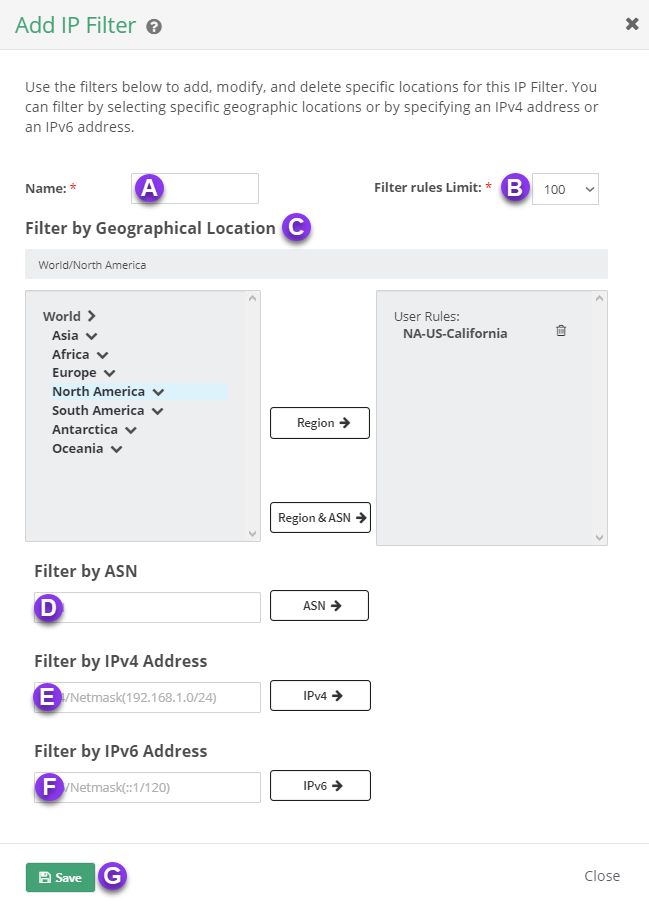
A. Name: This field will already be labeled according to the name it was given upon creation. Since you are updating the rule, it would be a good idea to rename it now for identification purposes.
B. Filter rules Limit: This option allows you to set limits for the number of rules you can have for your domain. You can have up to 500 IP rules.
Note: Be aware that billing for IP rules is based on increments of 100 (1-100 rules are the same cost). We recommend setting this rule no higher than is needed, as it can be adjusted at any time.
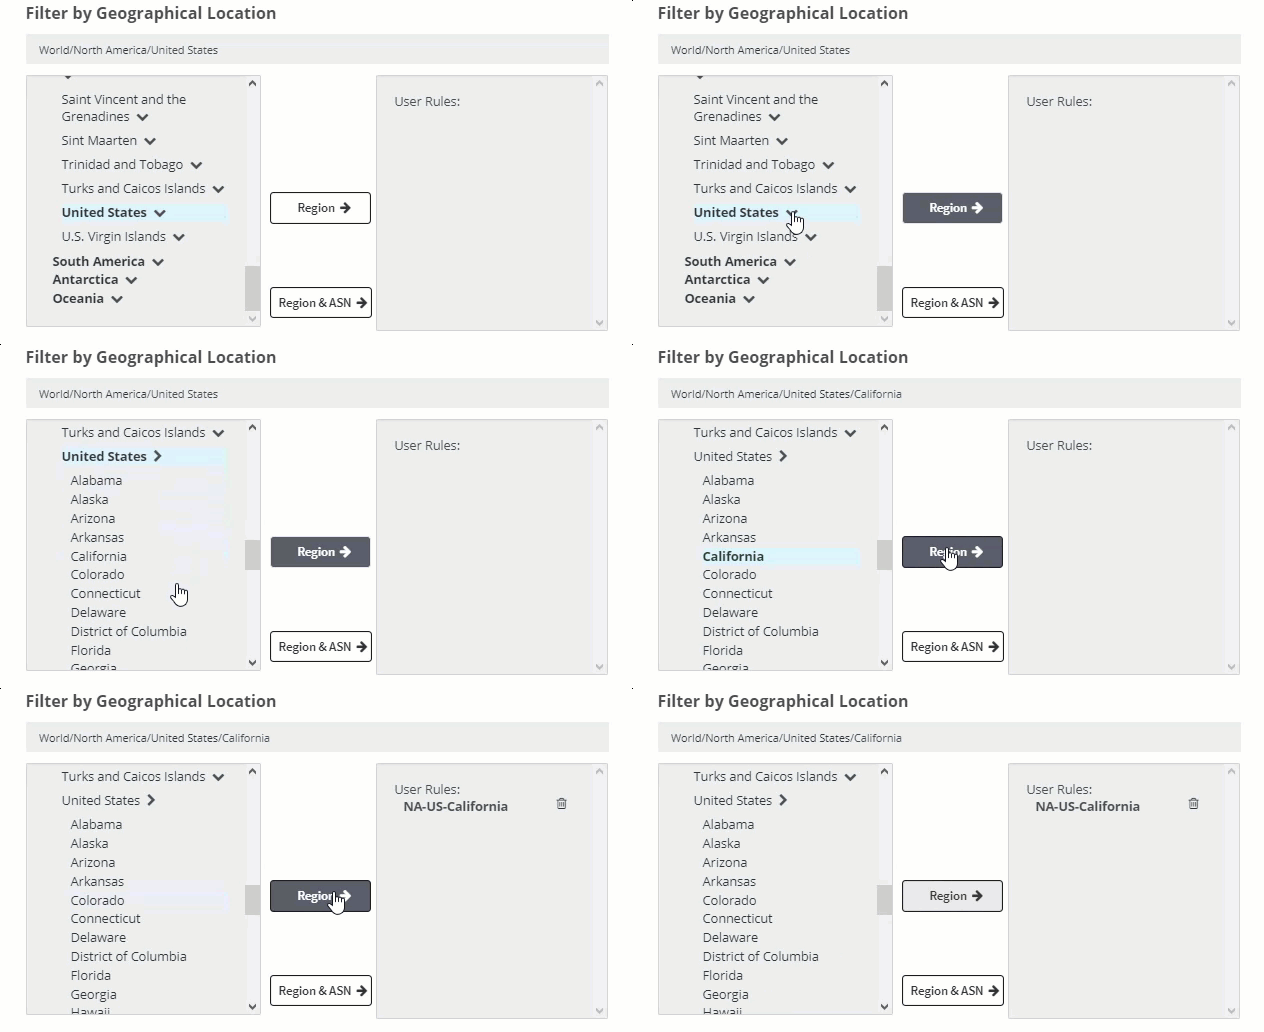
C. Filter by Geographical Location: Filtering by location lets you choose a region, state, or city for your rule. Click on the bolded arrow beside the country name to see all available options.
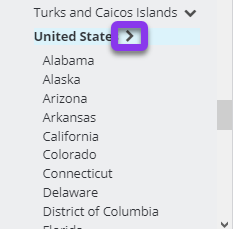
Next, click on the city, state, or region you want to add to the filter. Once you have highlighted an area, the Region→ button will turn dark gray; tap this button to add your selection to the User Rules section. Repeat until you have entered all locations that apply to this specific rule.
D. Filter by ASN: This option allows you to create a rule based on an ASN. Enter the ASN you wish to filter and then click the gray ASN→ button. This will add your selection to the User Rules section on the right. Repeat until you have entered all ASNs that apply to this specific rule.
E. Filter by IPv4 Address: Enter the IP or subnet (in CIDR notation) v4/netmask if you are filtering by IP and then click on the IPv4→ button to add the IP to User Rules.
F. Filter by IPv6 Address: Enter the IPv6/netmask if you are filtering by IP and then click on the IPv6→ button to add the IP to User Rules.
G. Save: Once you have added all of the rules for this filter, click the green Save button. After saving your Filter updates, you will receive a message confirming the filter was successfully updated and that the change has been propagated across all domains using the filter.

Visit our website for more information on our services and features.

