Knowledge Base
Migrating DNS from Network Solutions
In this tutorial, we show you how to migrate your DNS from Network Solutions to Constellix. These steps will ensure the process is seamless and as easy as possible. If at any time you run into problems during your migration, our support team will be glad to help.
Prerequisites
- You have already set up a Constellix account
- You have added your domain to Constellix
How to Migrate DNS from Network Solutions to Constellix
1. Log in to the Constellix Dashboard
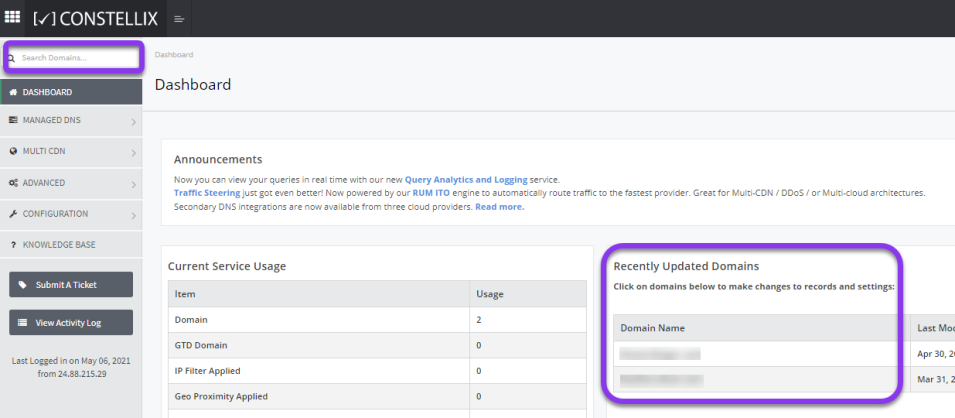
In the Constellix dashboard, select your domain from the Recently Updated Domains list or search for the domain in the top-left search bar.

2. Get Assigned Nameservers for your domain
After clicking on the appropriate domain, you will be taken to the Records page. Scroll all the way to the bottom of the page. Your nameservers will be found under the System NS Records section.

3. Access Your Domain at Network Solutions
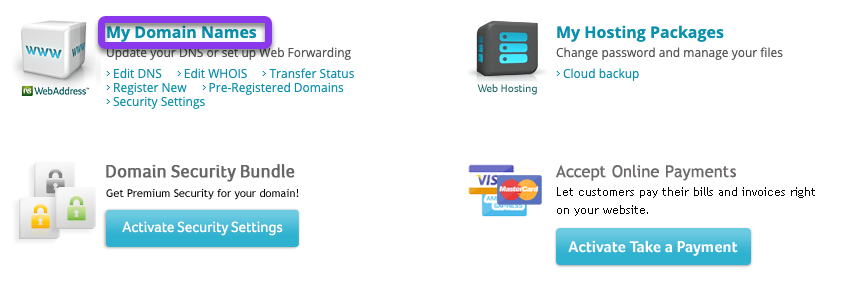
Log in to your current Network Solutions account. Navigate to the Account Manager page and click on My Domain Names.

4. Prepare to delegate nameservers to Constellix
Select Advanced Tools.

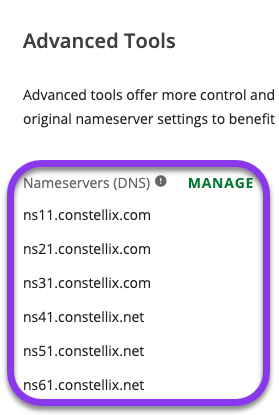
Once in the Advanced Tools section, click on Manage in the Nameservers (DNS) column.

5. Point Domains to Constellix
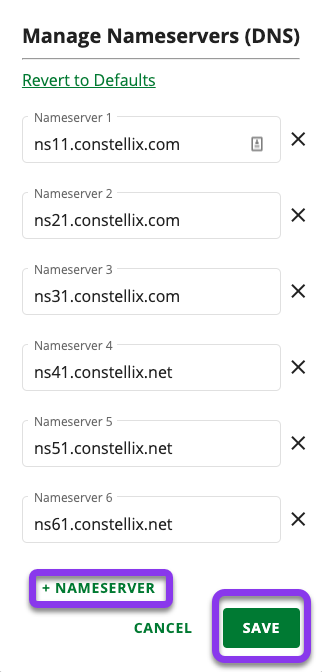
The Manage Nameservers (DNS) pop-up window should now be showing. Enter the Constellix nameservers in each field. To add the sixth server, click the +Nameserver option at the bottom of the window. Then hit the green Save button.

Your nameservers are now updated and pointed to Constellix. After clicking save, you will be returned to the Advanced Tools section in Network Solutions, which should reflect the nameserver changes.


