Knowledge Base
How to Adjust Time to Live (TTL) | Constellix | Knowledge Base
DNS was designed to allow the ability to change the Time to Live (TTL) for each DNS record. The TTL setting dictates how long information in a record will be stored in a resolver or recursive name server’s cache.
TTL is a crucial part of DNS as it affects query volumes and propagation speed. Any changes made to your records will not take effect until your most recent TTL has expired.
Common Use Cases
Best practices for TTL values depend on the type of record and how often the record is expected to change.
Example:
When using advanced DNS configurations such as Failover and Load Balancing, the TTL values for these records should be set as low as possible.
For recommended TTL values and more use cases for all DNS records, visit our What Is Best Practice for TTLs page.
Note: Some resolvers are unable to recognize TTL values that are less than 30 seconds. To see whether your resolver(s) allows a lower setting, it is advisable to create a test record first.
Prerequisites
- A domain has already been added to your Constellix account
- Records have been created or imported for your domain
Adjusting TTL Values For Your Domain
1. Click on your domain in the Constellix Dashboard
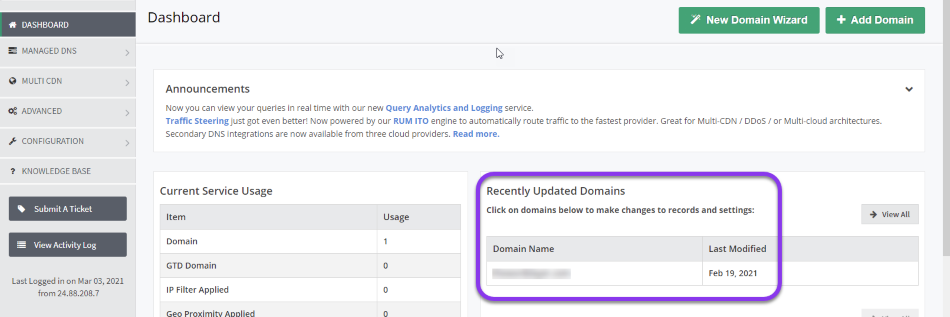
From the Constellix dashboard, click on the domain you need to configure in the Recently Updated Domains list on the right-hand side of the screen.

2. Select the record that needs to be configured
Tick the check box in the left column of the records field to select the record that needs TTL adjusted. Next, click the Edit Record button (pencil icon).

3. Change TTL values
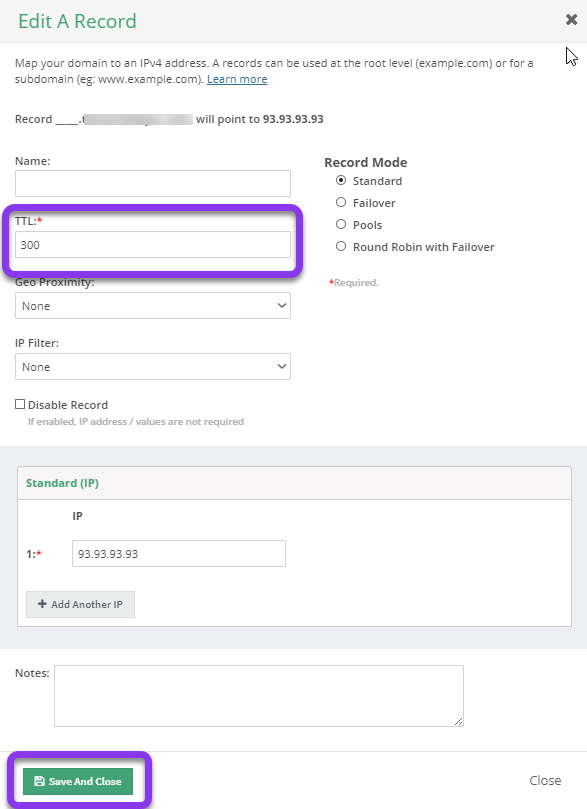
The Edit A Record pop-up window should now be open. Change your TTL to the appropriate value, then click the green Save and Close button at the bottom of the window.

4. Review and apply changes
After saving your changes, you will be redirected to the DNS records screen. You should see a yellow bar at the top of the screen with a message prompting you to review and apply the changes that were just made.
Tap the “click here” link to review and commit changes. For further guidance on committing changes to your DNS records, see this tutorial.


