Knowledge Base
How to Create a DKIM Record
DomainKeys Identified Mail (DKIM) records are modified TXT records that allow a recipient to validate a sender as the owner of an email message. DKIM uses a pair of private and public keys for authentication.
Private domain key:
Adds an encrypted signature to the header of a domain’s outgoing messages.
Matching public key:
The public key is what is added to your DNS record. Mail servers use this information to decrypt the signature and authenticate the message.
DKIM is how mail servers decrypt the message header and confirm that the message has not been altered. DK/DKIM values are generated by your email service provider and entered as TXT Records within Constellix DNS. Visit the DomainKeys public website to learn more.
Common Use Cases for DKIM Records
DKIM is an email security technology that is used to prevent email spoofing, spamming, and phishing. This helps prevent your domain from being exploited, protects your brand reputation, and protects your customers from interacting with fraudulent emails.
Prerequisites
- A domain is already added to your Constellix account
- You have already generated the domain key for your domain
Note: It is best practice to configure sender framework policies and DMARC records (both of which are also configured as TXT records) alongside DKIM records.
How to Create a DKIM Record in Constellix
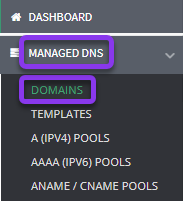
1. Navigate to Managed DNS > Domains
After logging in to the Constellix DNS dashboard, select Managed DNS on the left-hand side menu to expand options and then click Domains.

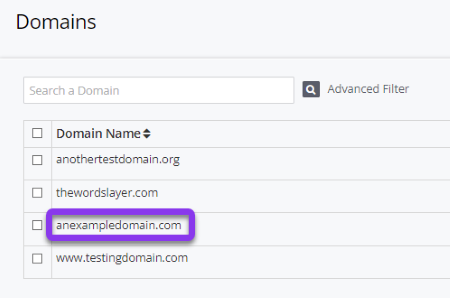
2. Select Domain
From the domains list, click on the domain you want to add the DKIM record to.

Note: Options shown may vary depending on the current configurations set for your domain.
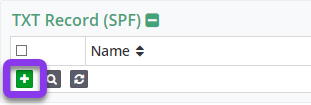
2. Expand TXT Record Options
After selecting the domain that needs the DKIM record, you will be taken to the Records page. Scroll down until you see the option for TXT Record and click the green + icon to expand options.

3. Add a TXT Record
Once options are expanded, click the green + icon to create your DKIM TXT record.

4. Enter DKIM TXT Record Values
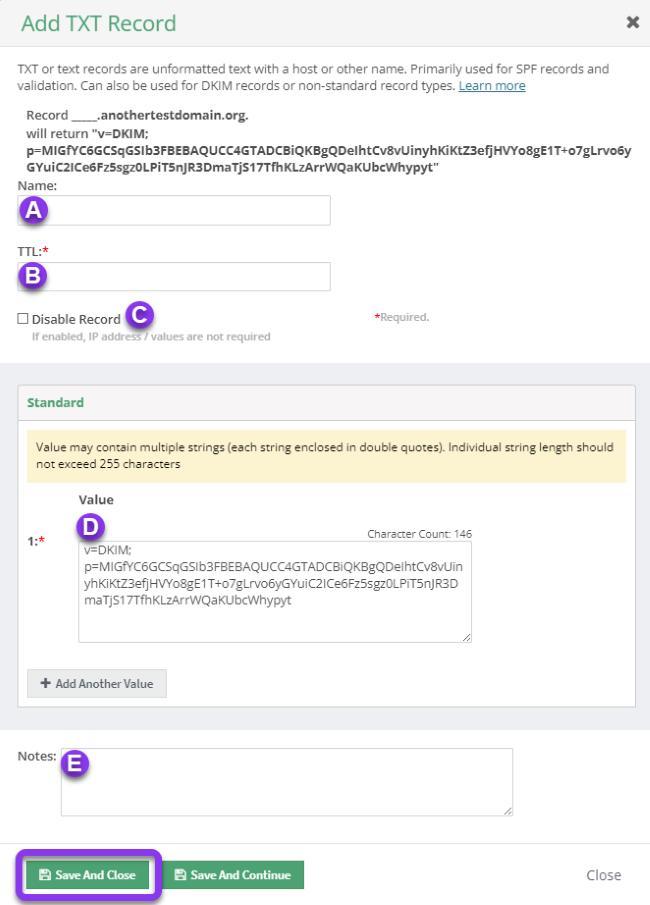
You should now see the Add TXT Record pop-up window.
Fill out the following values:
Note: The example value shown below is for demonstration purposes and is not valid.
a) Name: Enter the hostname for the record.
b) TTL: Time to Live (measured in seconds) determines how long a record is cached in resolvers.
Visit our What is TTL resource for more information and best practices for TTLs.
Note: For DKIM TXT records, we recommend a TTL of 3600 (default in Constellix).
c) Disable Record: With this feature, you are able to remove records from our nameservers without removing the record configuration in the Constellix DNS control panel. See our Disabling a Record tutorial for more information.
d) Value: Add the DKIM string generated from your email provider.
The typical format is:
v=DKIM; p=yourPublicKeyInformation
Note: TXT records can only contain strings of text that are a maximum of 255 characters. If longer than 255 characters, strings should be broken into parts and enclosed in double quotes (“example text” “example text”).
e) Notes: This section is helpful for adding notes with keywords so that you can easily search for specific records later (optional but recommended).
Save: Tap the green Save and Close button.
Note: In order for your DKIM TXT record to take effect, you must review and apply changes.
Visit our website for more information on our services and features.


