
Knowledge Base
Microsoft Azure API Integration
Microsoft Azure API Integration with Constellix
Please follow the steps listed below to integrate Constellix with Microsoft Azure. Once the two services are integrated, all DNS changes must be made within the Constellix DNS control panel.
1. Navigate to Configuration > DNS Providers
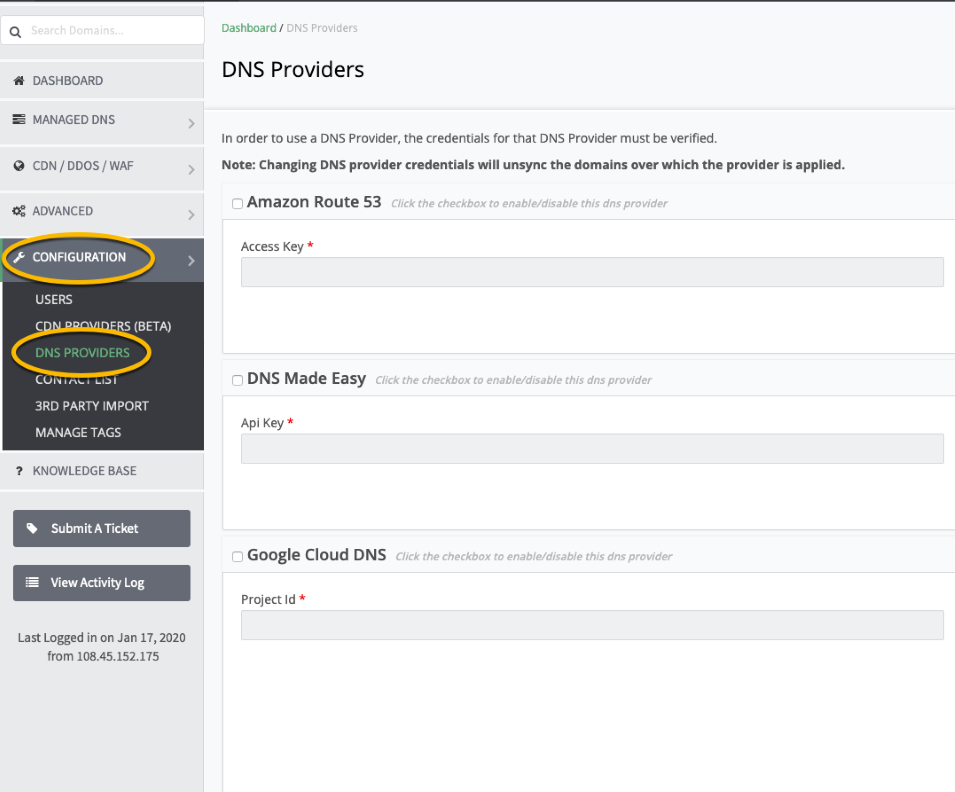
2. Click the check box to activate the Microsoft Azure provider field

3. Next you will need to obtain 4 sets of credentials from Microsoft Azure (Subscription ID, Client ID, Tenant ID, and Client Key) and enter them in the appropriate field as depicted below:

4. To obtain your Subscription ID log into your Microsoft Azure account, navigate to the Azure Home page, and click on "Subscriptions".

5. From here, copy your Subscription ID and paste it under the Subscription ID field in the Constellix interface

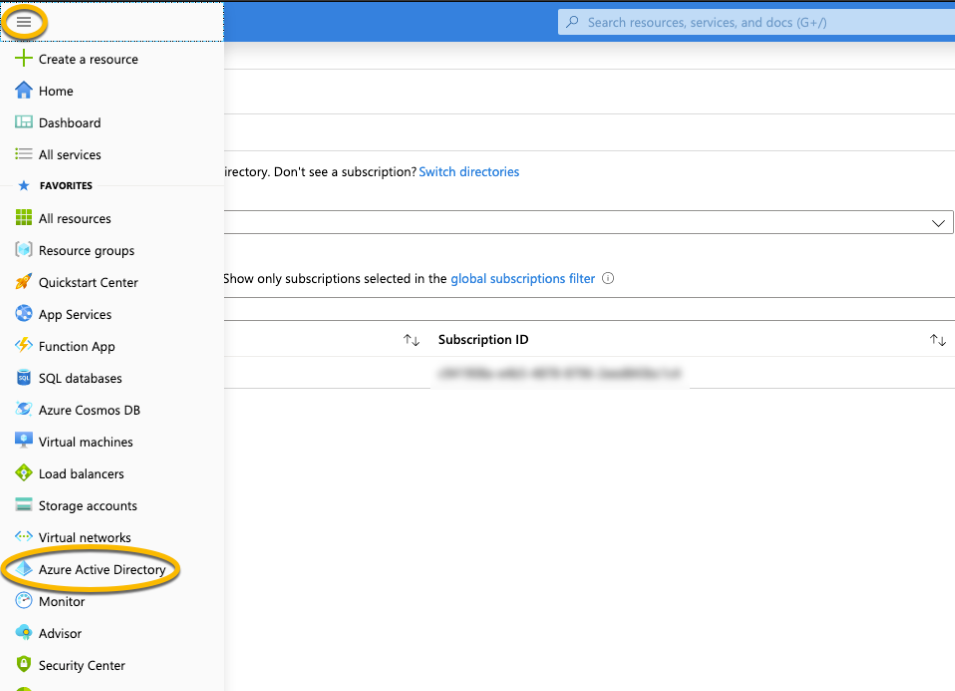
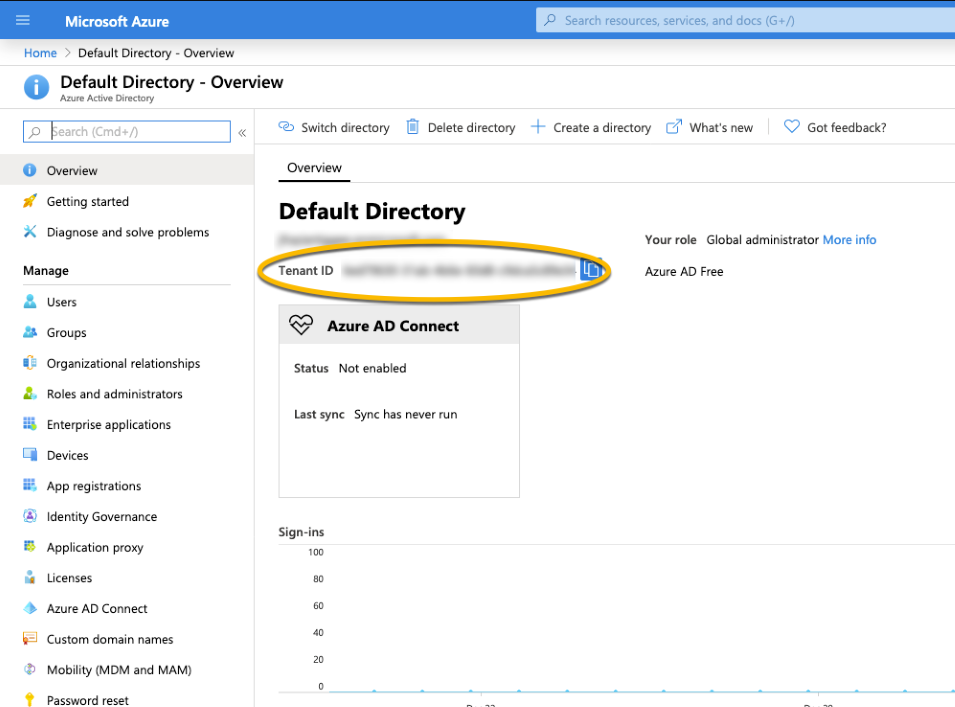
6. To obtain your Tenant ID, click on the drop-down menu in the upper left and select Azure Active Directory
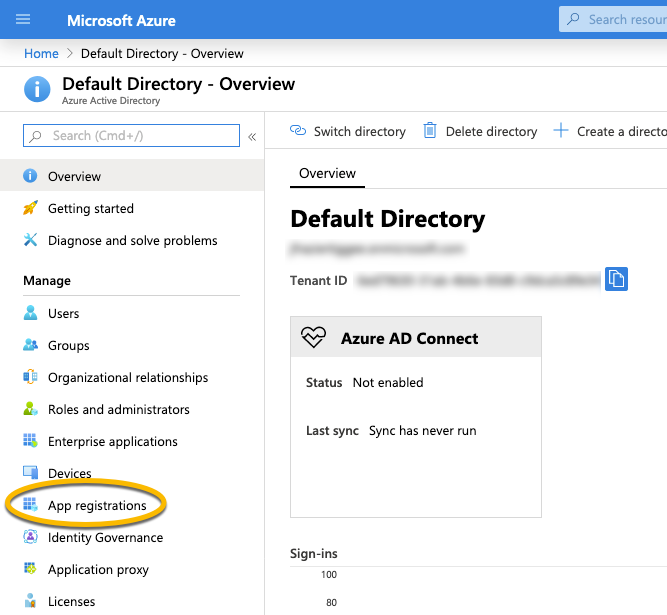
7. To obtain your Client ID click on App Registrations in the menu on the left

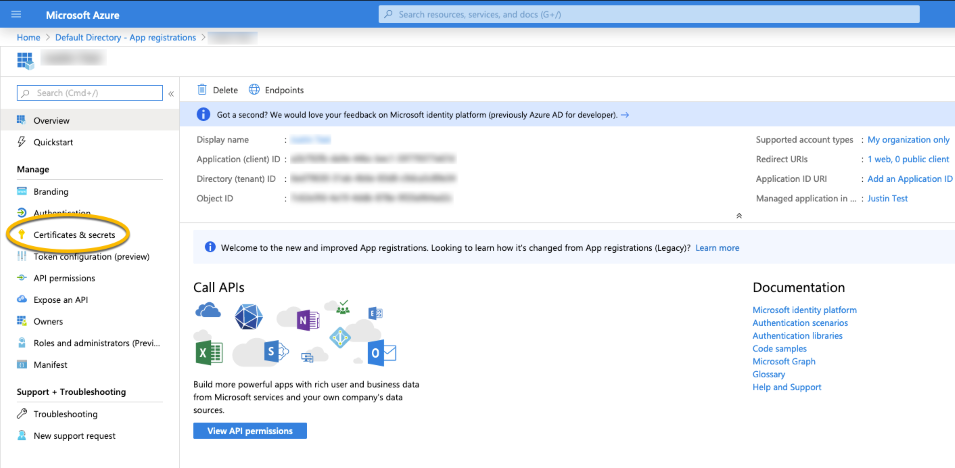
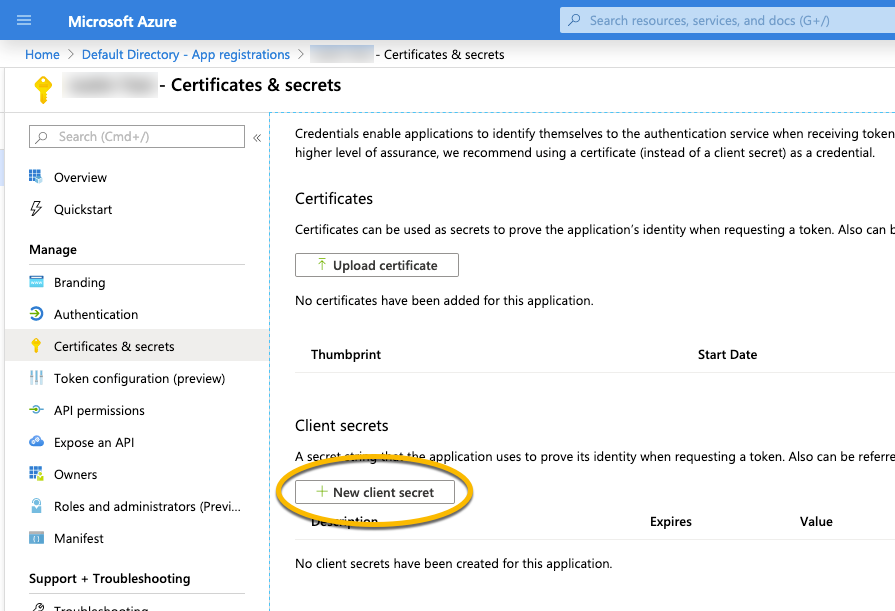
8. To obtain the Client Key, click on your application, select "Certificates & secrets" from the menu on the left, and click on "New client secret"

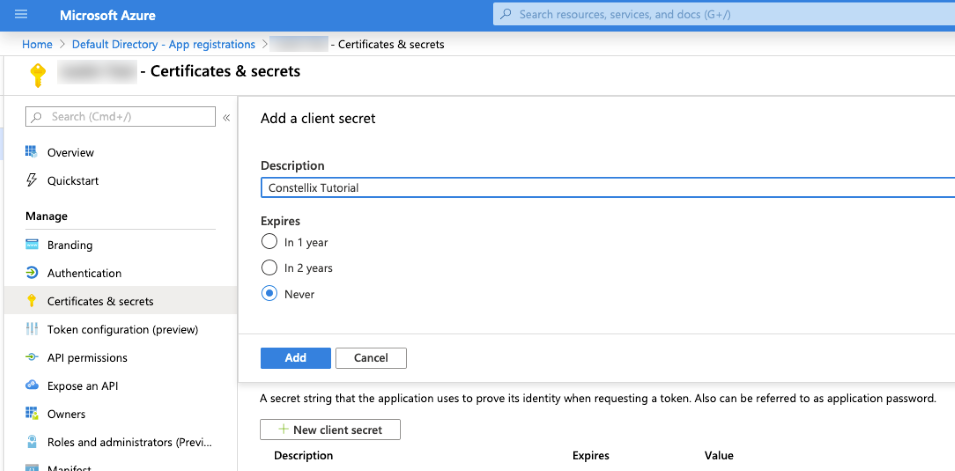
9. Enter a brief description and select the amount of time you would like the key to be good for. Then click "Add":
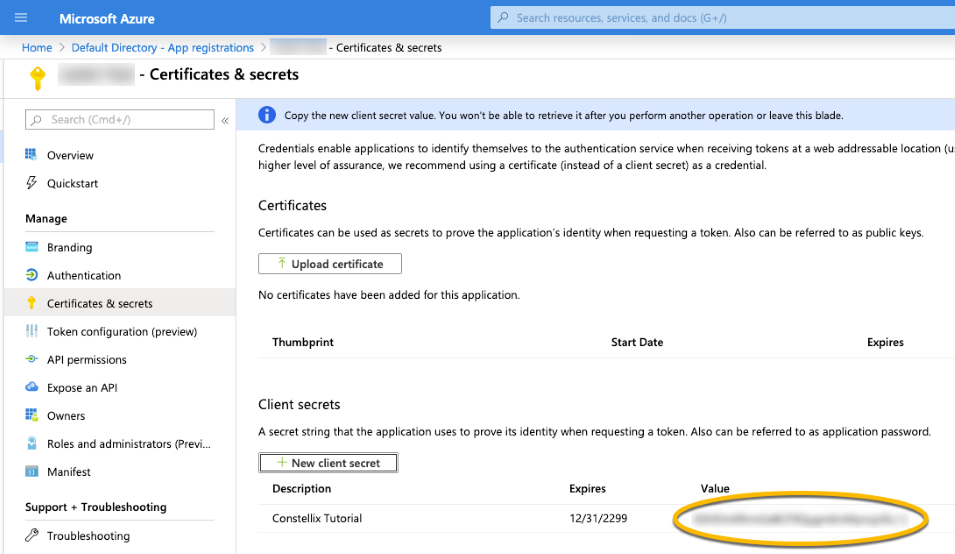
10. Once you click add you will be given your "Client Key". Copy that key and place it under the "Client Key" field in the Constellix interface. Note: once you exit this screen in the Azure interface, you will not be able to retrieve that key again.
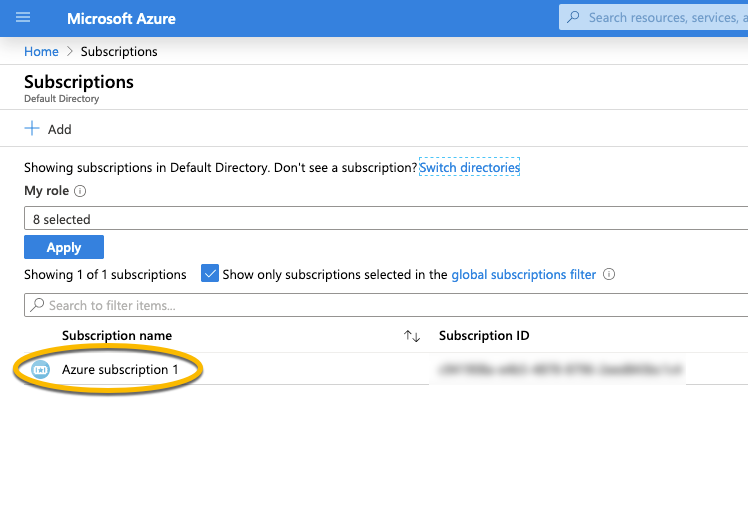
11. Before you can authenticate your Azure account in Constellix you will have to configure the correct permissions on your Azure "App". To do this navigate back to the "Home" page in your Azure account and click on "Subscriptions". Then select your subscription.

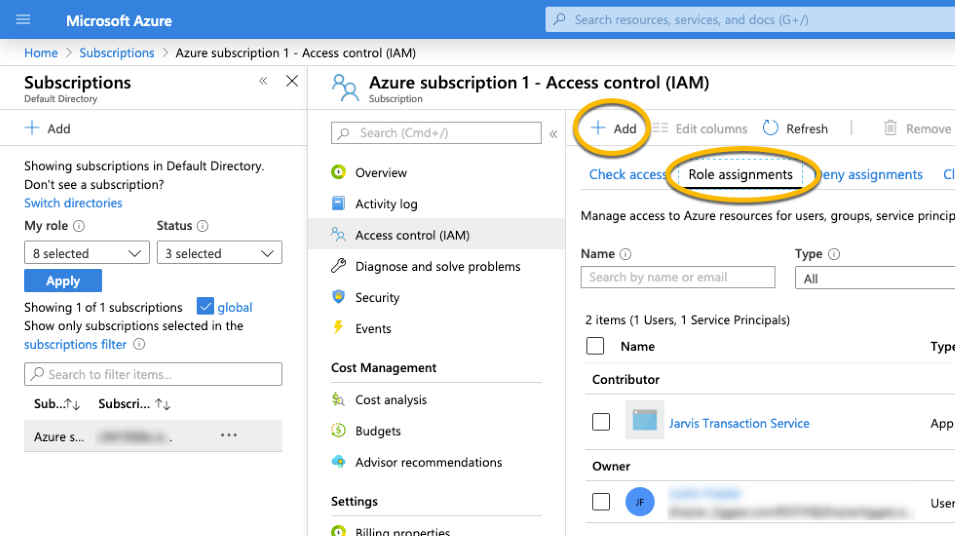
12. Next click on "Access control (IAM)" > "Role assignments" > "Add" to add a new Role assignment

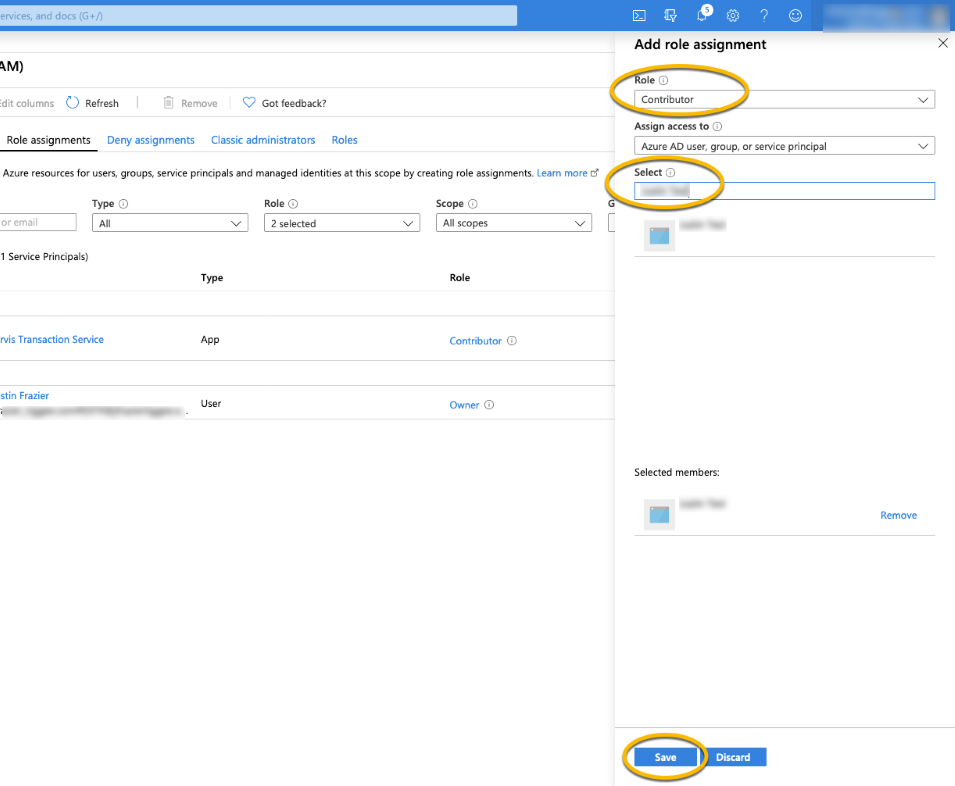
13. From the "Role" drop-down, select "Contributor". Then type in the name of your "App" in the "Select" field and click "Save"
14. Once step 13 is complete go back to your Constellix interface and click "Verify & Save". If all steps were followed correctly you should see the confirmation message on your screen ("DNS Provider "Microsoft Azure" saved successfully") and a green check should appear next to the provider name.


