
Knowledge Base
Secondary DNS | Constellix | Knowledge Base
Overview
Constellix doesn’t offer traditional Secondary DNS but does support Primary/Primary configurations through API integrations. Built-in support is included for Google Cloud DNS, Microsoft Azure, and Amazon Route 53. This tutorial will demonstrate how to configure a secondary DNS provider in Constellix.
Note: Integrations with other providers can be set up with the help of one of our support specialists.
Common Use Cases for Secondary DNS (Primary/Primary)
Having a secondary DNS provider is the most effective way to protect your domain from a DNS or provider-related outage. If you rely on a single provider and they go down, your domain will be inaccessible until the provider fixes the issue and comes back online. With secondary or primary/primary DNS, all traffic will automatically be redirected to the secondary provider in the event the primary host experiences an outage. The secondary provider will then return all queries and attempt to retry any unanswered requests.
Note: If you require a traditional Secondary DNS configuration (Primary/Secondary), we recommend using our sister company DNS Made Easy.
Prerequisites
- A domain has been added to your Constellix account
- You have a basic understanding of APIs
- You have the nameservers of the secondary provider
If you need help with setting up API integrations with your chosen provider, please visit the following tutorials:
Note: API integration will keep your record configurations in sync between both providers. However, you are limited to only using services that are offered by both providers. For example, you cannot use some GeoDNS features with Secondary DNS as most providers do not offer an equivalent service.
How to Configure Secondary DNS
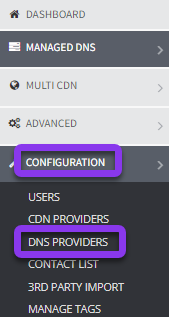
- Navigate to Configurations > DNS Providers
After logging in to the Constellix DNS dashboard, select Configurations on the left-hand side menu to expand options and then click DNS Providers.
- Select Provider and Add Keys
Once on the DNS Providers page, select the provider you want to use in your secondary configuration by checking the box beside the provider’s name. For this tutorial, we will be using Amazon Route53.
Next, enter the information needed from the provider such as Keys, ID, etc., and then click Verify & Save.

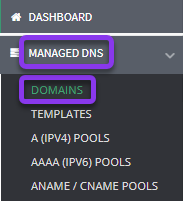
- Navigate to Managed DNS > Domains
After logging in to the Constellix DNS dashboard, select Managed DNS on the left-hand side menu to expand options and then click Domains.
- Select Domain
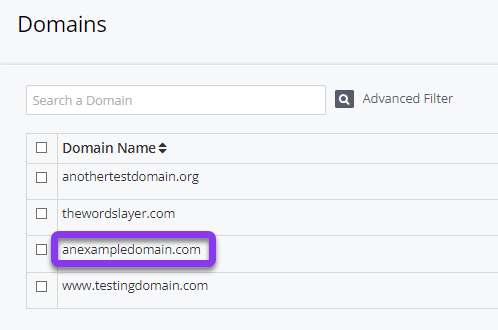
From the domains list, click on the domain you want to add the secondary DNS configuration to.
- Apply the Secondary Provider to the Domain
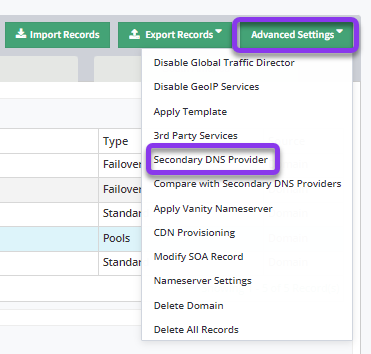
After selecting the appropriate domain, click the green Advanced Settings button on the far right-hand side of the page, and then select Secondary DNS Provider from the drop-down list.
- Choose Provider and Domain Options
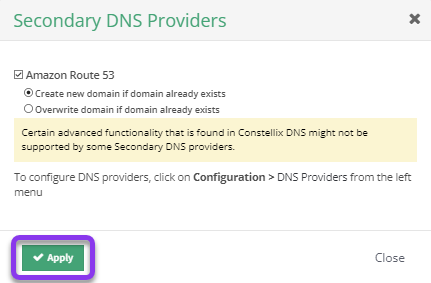
In the Secondary DNS Providers window popup, select the provider you wish to add as secondary and choose whether you want to create a new domain if one already exists or if you would like to overwrite a domain if it currently exists. Tap the green Apply button to finish.
- Create NS Records
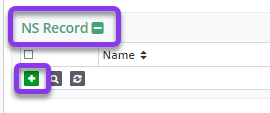
Scroll to the bottom of the records page and you will see the NS records for Constellix and the secondary provider. In this example, we used AWS/Route53.

Next, you will need to add NameServer (NS) records that point this domain to the available set of nameservers belonging to the other AWS (or another provider).
Click the green + icon next to the record name to create an NS Record in Constellix.
Important: This step needs to be done in the secondary provider’s account as well. Please refer to each prospective provider’s documentation for help configuring records in their platforms.
- Enter NS Record Information
In the Add NS Record window, enter the following information:
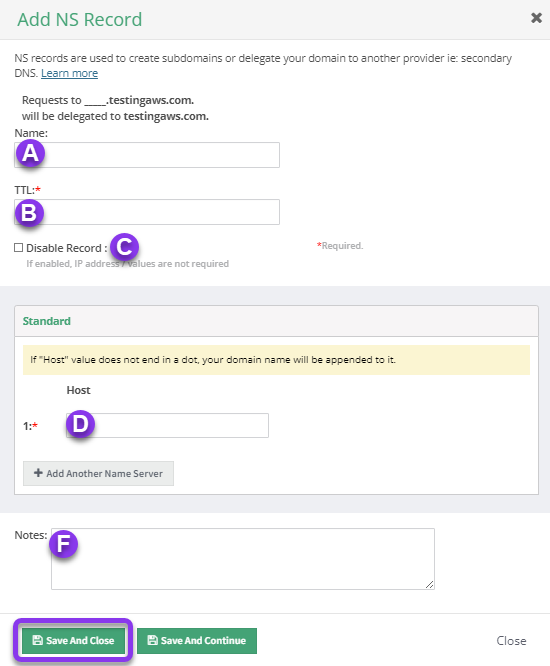
A. Name: Enter the hostname for the record.
B. TTL: Time to live (measured in seconds) determines how long a record is cached in nameservers. Visit our What is TTL resource for more information and best practices for TTLs.
Note: For NS Records, we recommend a TTL of 86400. This is due to the large volume of queries generated for these record types and the extremely low rate of changes they require. NS records are also queried alongside any query for your domain.
C. Disable Record: This option allows you to remove records from our nameservers without removing the record configuration in the Constellix DNS control panel. See our Disabling a Record tutorial for more information.
D. Host: Enter the nameserver information. For example, ns11.nameserver.com.
E. Notes: The note section lets you add important details and keywords so you can easily search for specific records later (optional, but recommended).
F. Save: To add more NS records, click on Save and Continue, otherwise, select Save and Close.
Note: In order for your record changes to take effect, you must review and apply changes.
- Update your Registrar
After configuring your NS records for each provider, you will also need to update your domain registrar with the nameservers of both providers. You will have 6 nameservers from Constellix, and the remaining nameservers will be from your second provider.
Visit our website for more information on our services and features.

