
Knowledge Base
QVSS Quick Guide eToken
Solution
Please follow the steps below to set up your QuoVadis Signing Service:
Definition of terms:
- Transport code: Security code received via SMS (if mobile numer is available) or mail for changing the certificate password.
- OTP PIN: Self-assigned PIN during the set-up of the MobilePASS app (NOTE!)
- Passcode: Changing 6-digit code which is displayed after successfully setting up the MobiePASS app.
- Certificate password: Self-assigned password after password change (NOTE!)
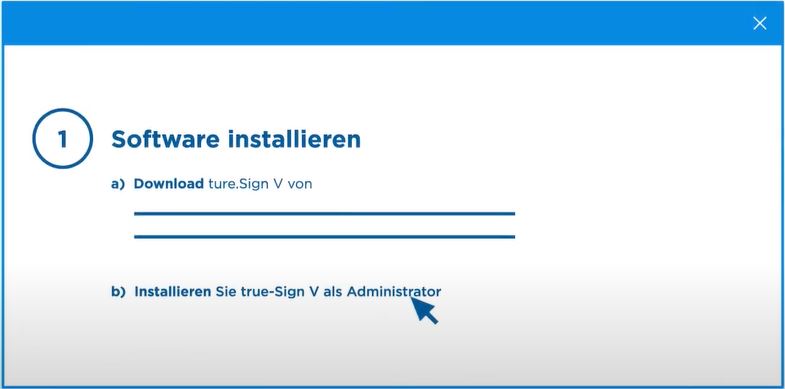
Step 1: Download and install true-Sign V software
- Download true-Sign V on
64-Bit: http://downloads.quovadisglobal.com/CH_SIDSS_TRUE_SIGN_V_CLIENT_WINx64.zip
32-Bit: http://downloads.quovadisglobal.com/CH_SIDSS_TRUE_SIGN_V_CLIENT_WINx86.zip - Install true-Sign V on your PC / laptop
Step 2: Setting up the eToken
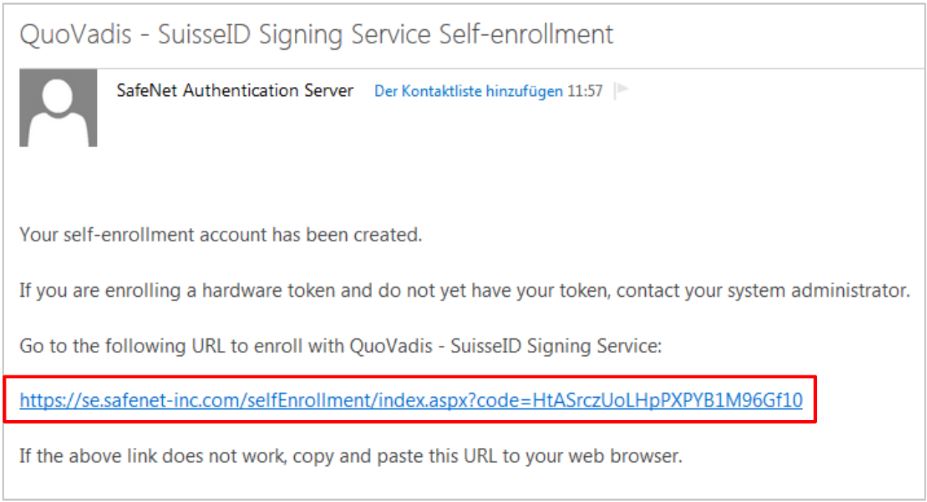
Self-Enrollment E-Mail:
You will receive an email from "SafeNet Authentication Server". Open this email on your PC and click on the Self-EnrollmentLink:
Activation:
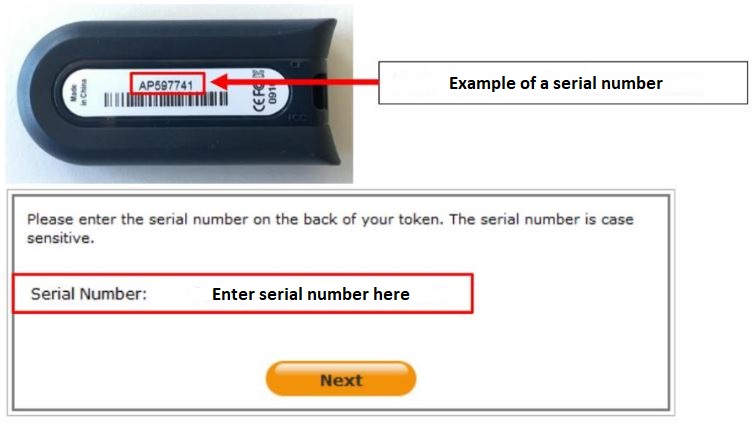
- Enter the serial number of the eToken Pass on the newly opened website.
- Then confirm with "Next".
- You will find the serial number on the back of the eToken you received from QuoVadis:
- You will find the serial number on the back of the eToken you received from QuoVadis:
Confirmation:
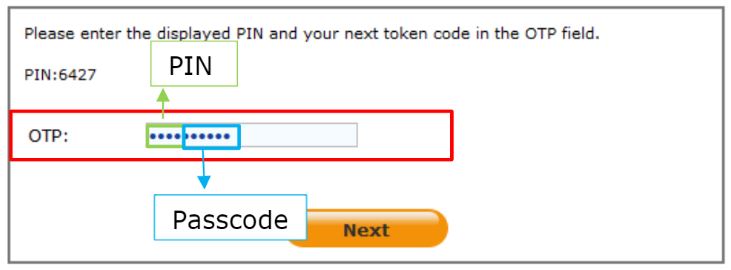
- After successfully entering your serial number, you will receive your OTP PIN (write it down!), as shown in this example:

- Now enter your OTP PIN and a newly generated passcode:
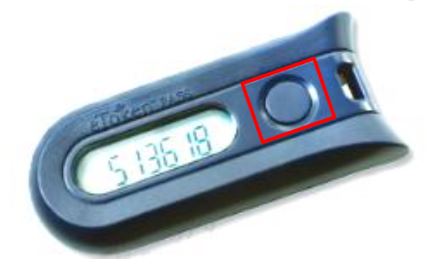
- You can obtain a passcode by pressing the button on the front of the eToken:
- Be careful not to enter a character space between the OTP PIN and the passcode.
- You can obtain a passcode by pressing the button on the front of the eToken:
Finish:
- Finally, you will receive the following success message on the website:

Important: Use a new passcode for each authentication process, which you will receive at the touch of a button on your eToken.
Step 3: Link certificate with PC software true-Sign V
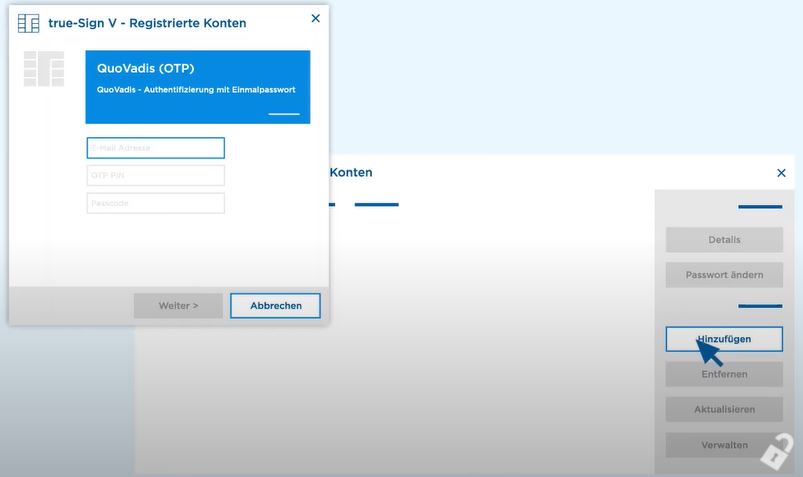
- Open the true-Sign V Client on your PC / laptop via Windows START → true-Sign V.
- Click on Add
- Your login data consists of your email address, the OTP pin you set earlier during the start-up of the MobilePASS app and the automatic passcode generated in the Mobile Pass app previously installed on your mobile phone by clicking on your email address/profile name.
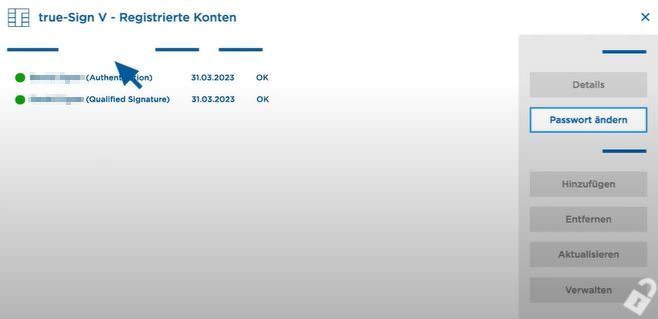
- To define your personal certificate password, select your certificate on the left. Select "Change password" on the right and enter the appropriate transport code for the respective certificate. You have received the transport code via SMS from QuoVadis. Please remember the newly defined password, you will need it again later when using the QuoVadis Signing Service to activate your digital signatures.
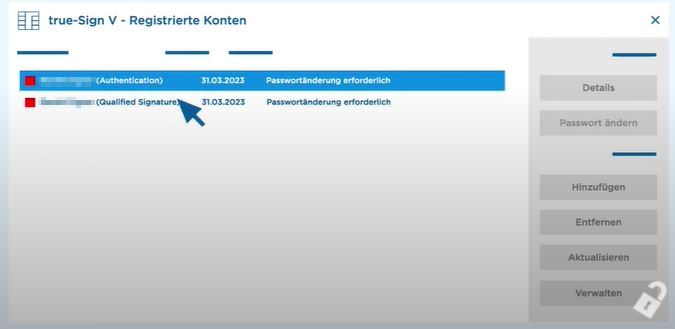
- Select "Change password" on the right and enter the appropriate transport code for the respective certificate. You have received the transport code from QuoVadis via SMS. Please remember the newly defined password, you will need it again later when using the QuoVadis Signing Service to activate your digital signatures.
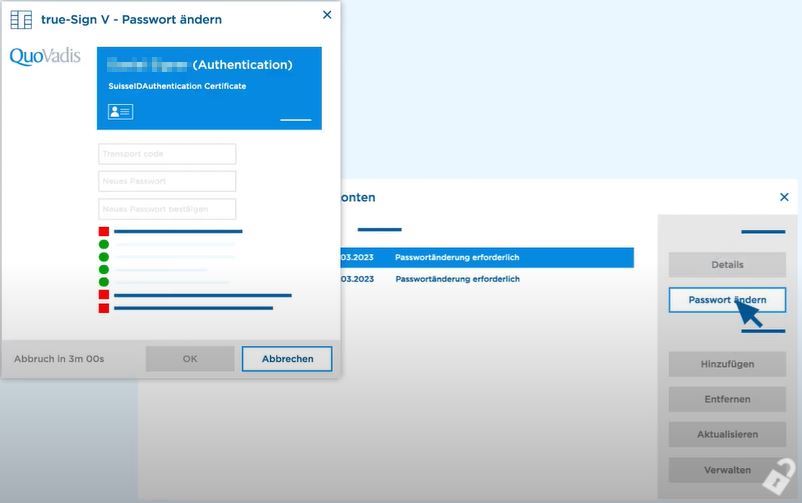
- After a successful password change, the colour in front of the certificate changes to green.
- Finally, please restart your computer, this will ensure that all certificates are correctly integrated into the Windows system.
- The set-up has now been successfully completed.

