Knowledge Base
Modify User Groups and Permissions
Overview
DNS Made Easy allows account administrators to create permission-based users and groups. This affords full control over which configurations and services each team member has access to.
NOTE: This tutorial is only applicable to Corporate accounts or for Business accounts that have purchased additional services.
Common Use Case for Removing Sub-users in DNS Made Easy
It may be necessary to modify a user’s permissions if a team member has switched roles within the company and requires access to different DNS-related features in your DNS Made Easy account.
Prerequisites
- You have already created users for your account and need to modify permissions for one or more users.
- One or more Groups have been created for your account.
How to Modify User Permissions in DNS Made Easy
- Login and Access User Management
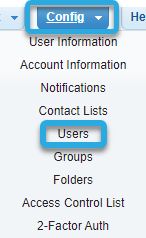
After logging in, hover over the blue Config tab at the top of the screen and select the option for Users.

- Select User You Want to Modify
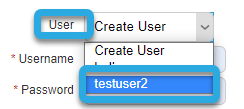
You should now be on the Users page. Select the user that needs to be modified from the User dropdown box.

- Modify Groups (optional)
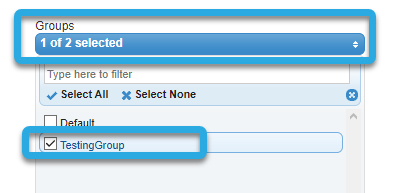
If you need to change which group the user belongs to, click on the blue Groups menu to expand options. Select the group you want to add the user to and then click Save.
- Modify Permissions
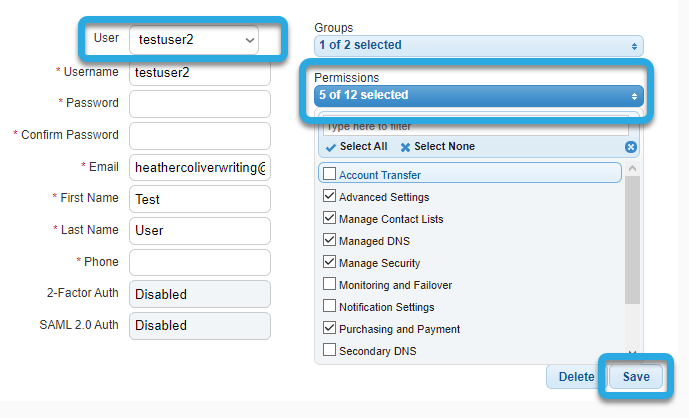
To modify permissions, make sure the correct user is selected in the User dropdown menu, and then click the blue Permissions menu to expand options.
Check the box beside any permissions you want to add or uncheck the box for any permissions you want to remove.

To save your modifications, click the blue Save button.
Visit our website for more information on our services and features.

