- Contact Us
-

choose your language
-

Knowledge Base
How to Create a Certificate Profile | PKI Platform
Description
These instructions will show you how to create a basic certificate profile in DigiCert MPKI Platform 8. You can use these same steps to create any of the various certificate profiles within the version 8 platform.
- Access the DigiCert PKI 8 Admin Portal.
- Log in with the proper account credentials.
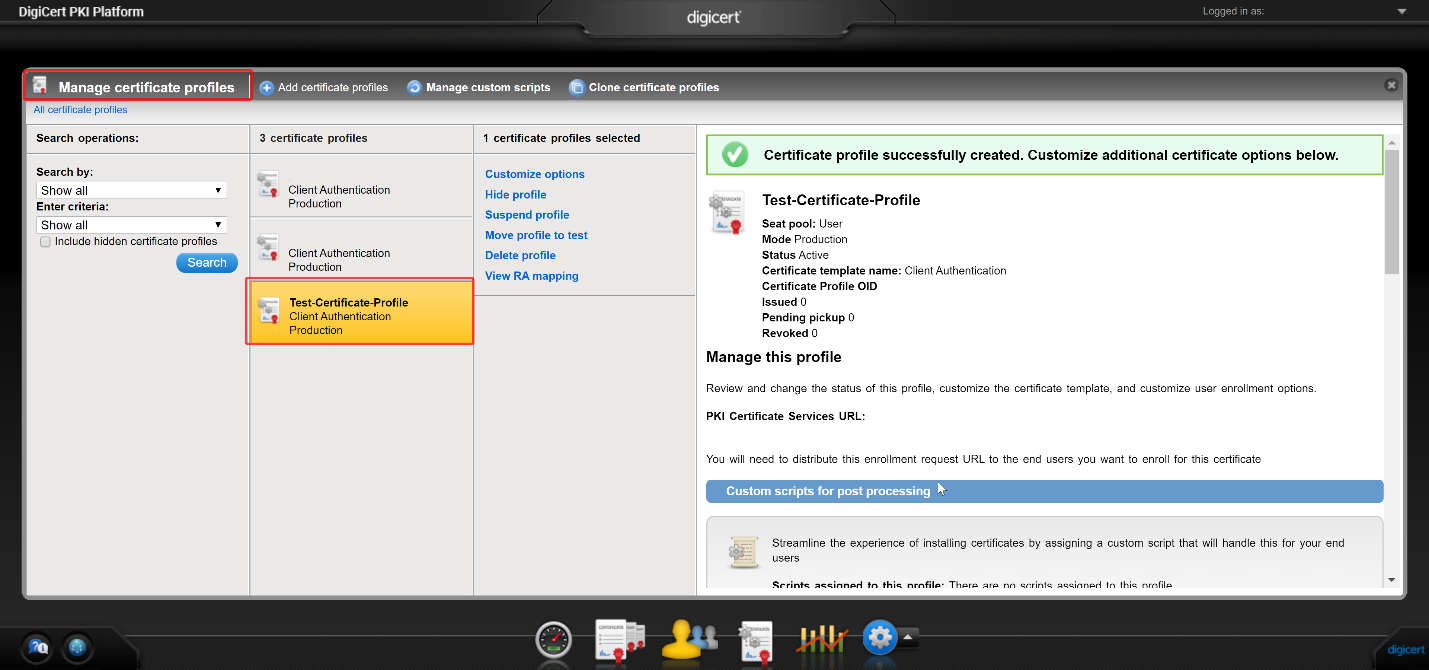
- From the main profile window, click the "Manage Certificate Profiles" icon or cog icon and click the "Manage Certificate Profiles" link.
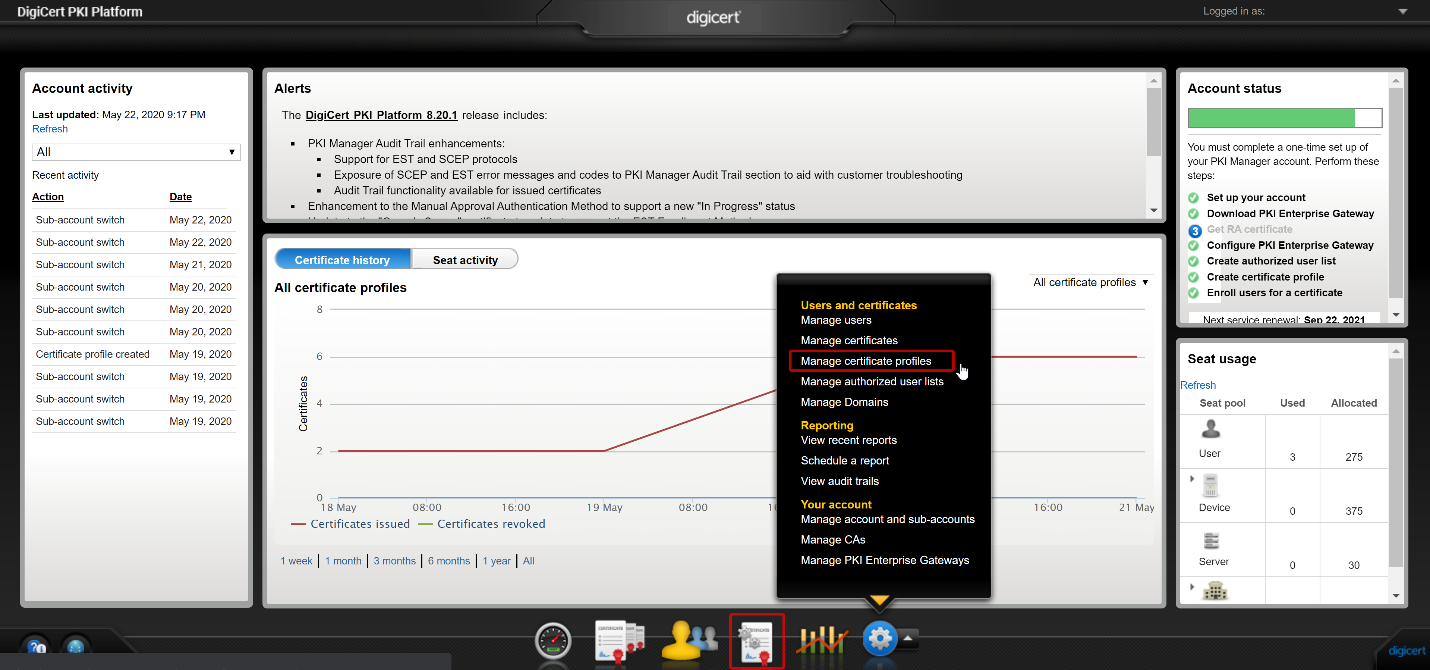
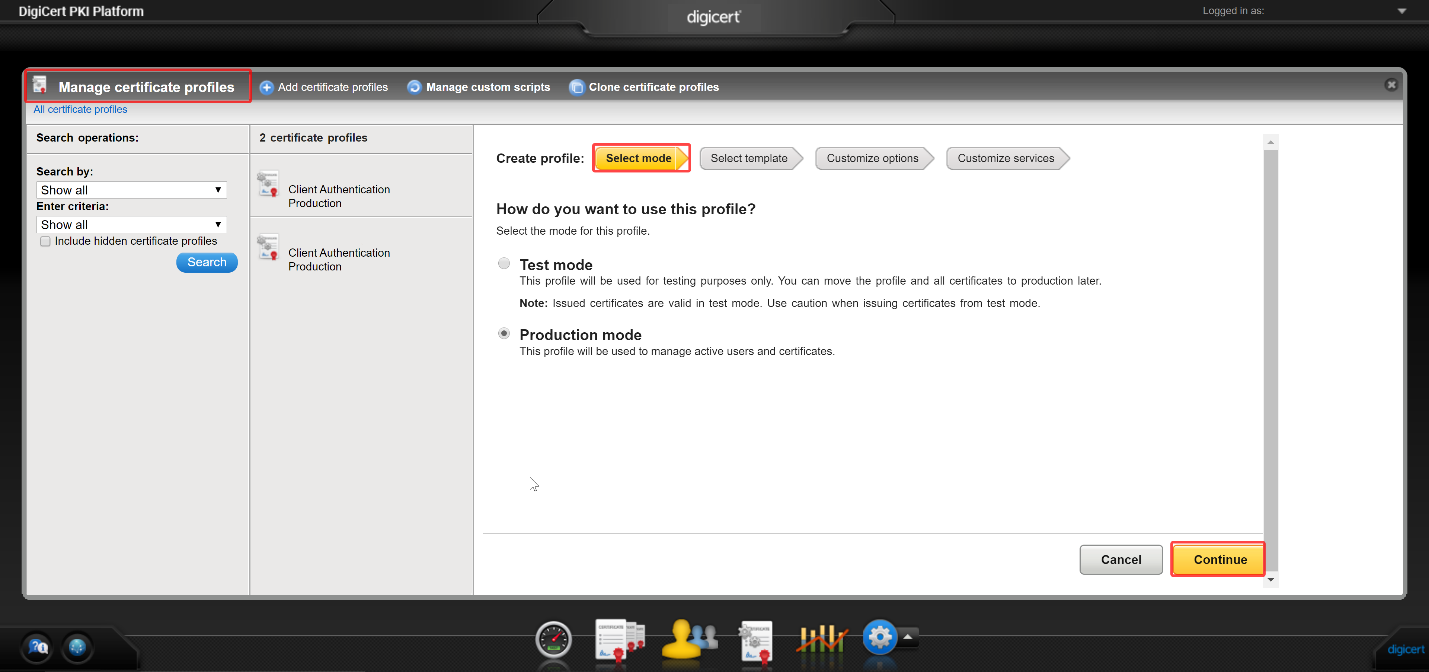
- Click the "Add certificate profiles" link, you will see the window on the right change to "Select Mode" inside the yellow arrow for reference.

- Select how you would like to use the profile "Test" or "Production", then click the "Continue" button on the bottom right side of the window.
- The reference arrow will now display "Select Template" and a list of options will be available for you to choose, for our example we will choose "Client Authentication".
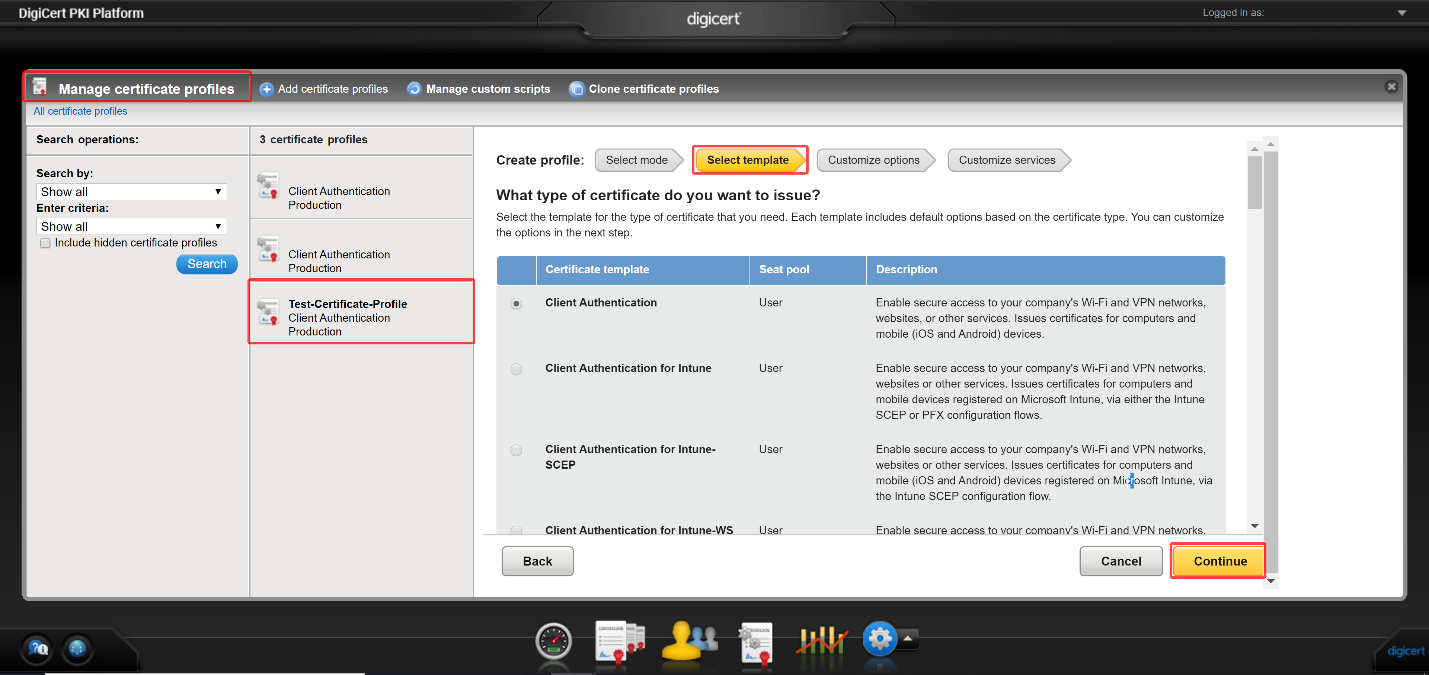
Each template includes default options based on the certificate type. You can customize the options in the Customize options page. - Click the "Continue" button on the right bottom of the window to proceed to the next page.
- The reference arrow will now display "Customize Options" and the option to add a certificate friendly name is now available (it is recommended you use a name that will be easy for you to recognize).
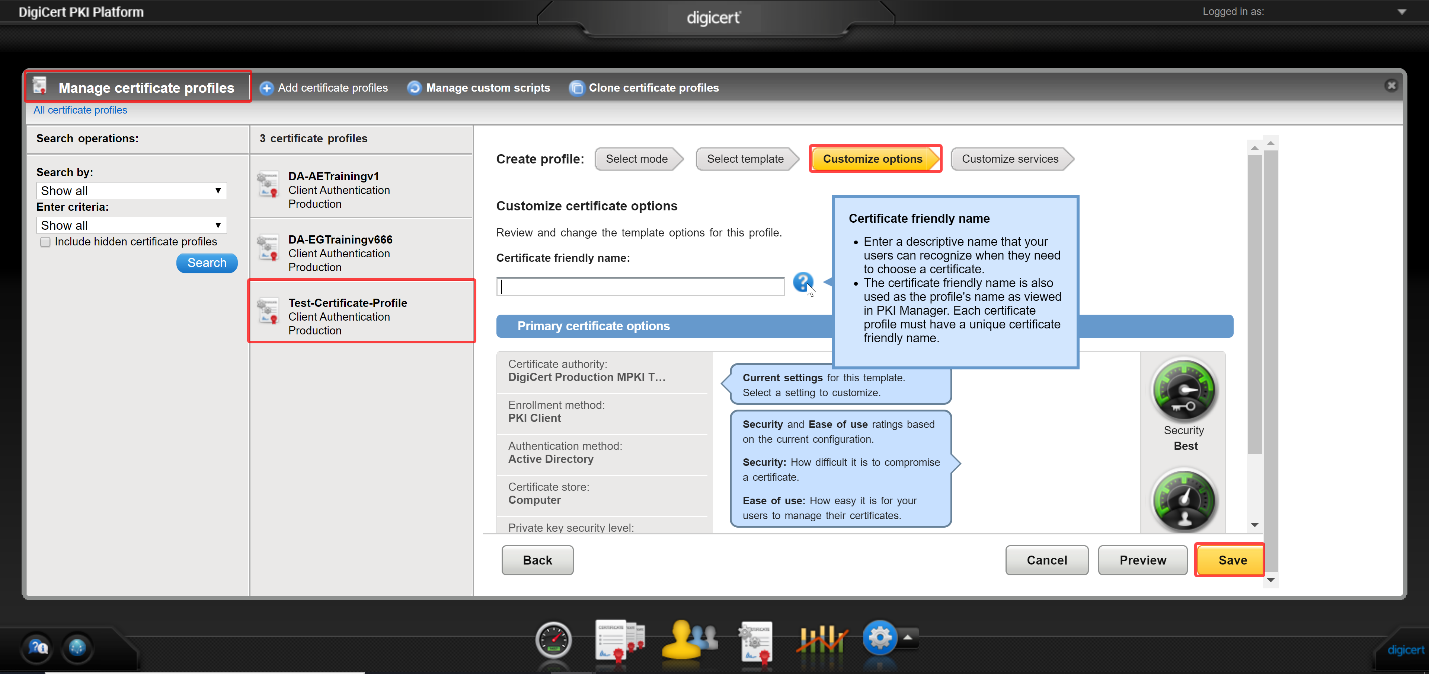
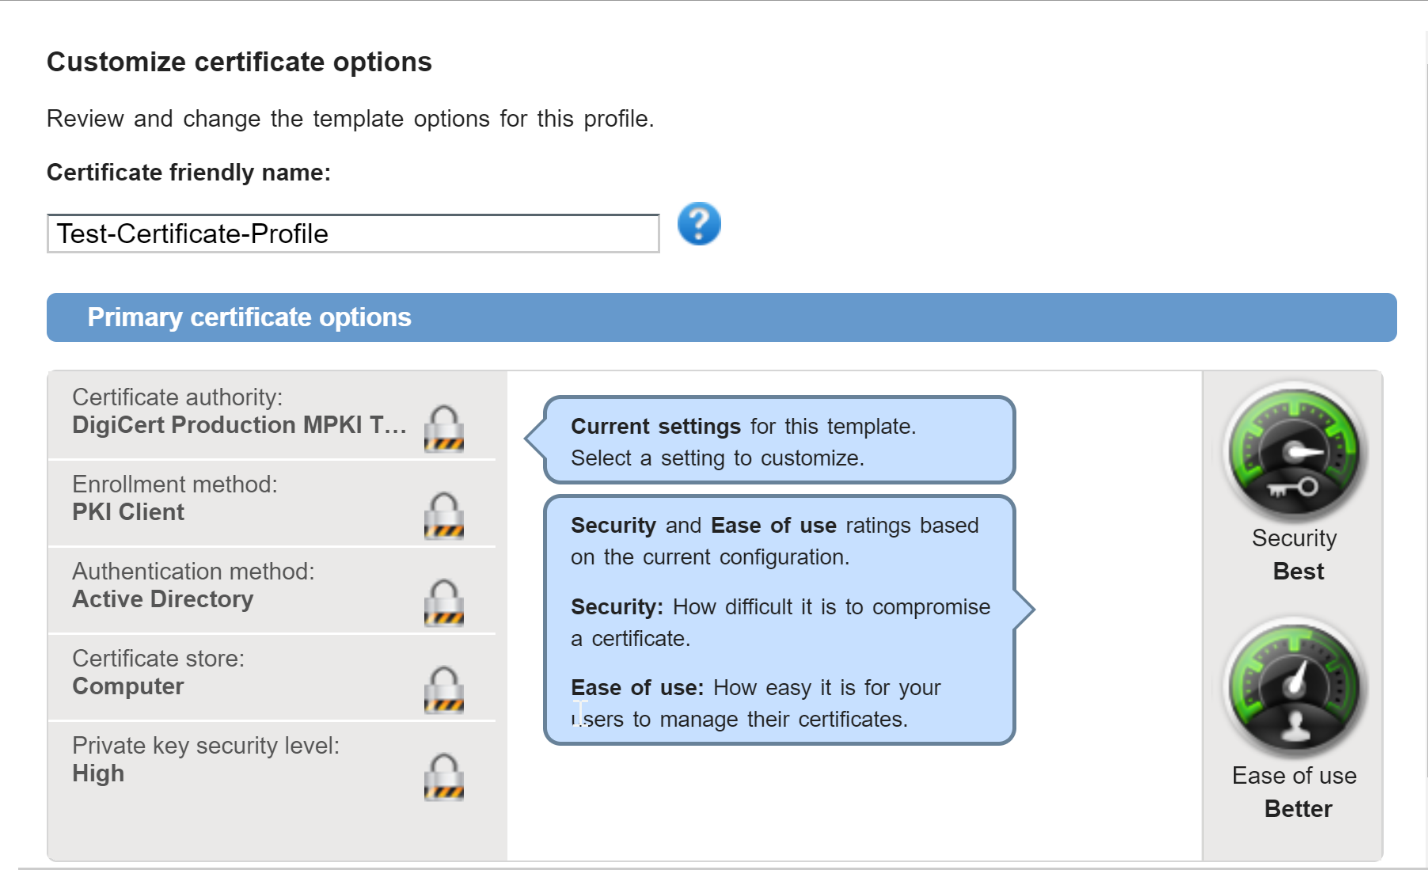
PLEASE NOTE: Once you save the certificate profile, you cannot change the primary certificate options. The lock icon will appear after you save the certificate profile preventing modification. - The "Customize Options" window provides several "Primary certificate options" which includes the ability to change the:
- CA (Certificate Authority)
- Enrollment method
- Authentication Method
- Certificate Store
- Private Key Security Level
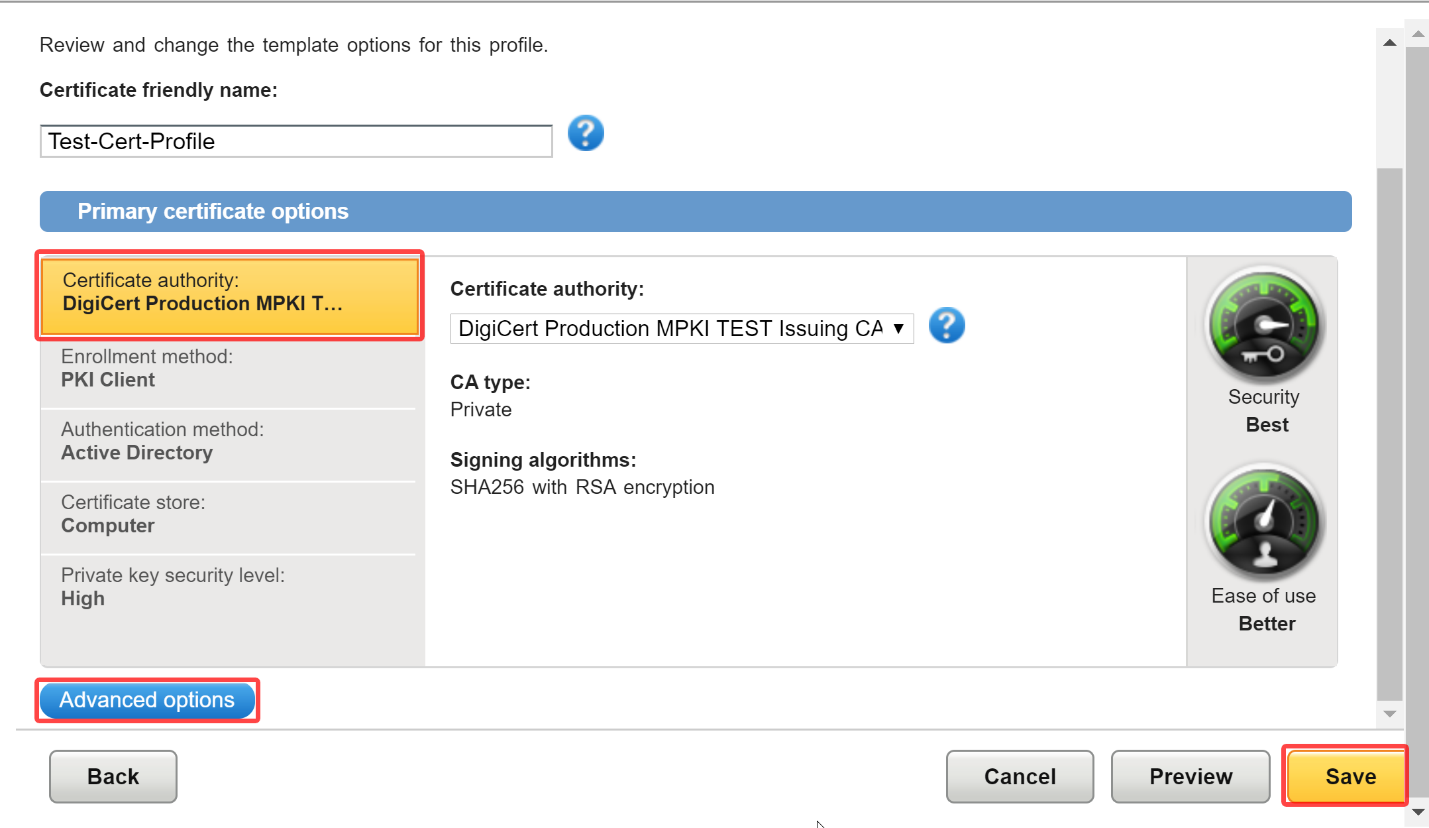
To select SAN, EKU and Validity period for the profile, select "Advanced Options".
- CA (Certificate Authority)
- Once you have selected the supported options for your environment, click "Save" on the bottom right side of the window.
A small window will pop up and ask if you would like to continue to save the certificate profile with one last chance to change the primary certificate options.
- Upon saving your certificate profile, you will have the option to only change the "Advanced Options" from the "Customize Options" link.
For more information, please click on the "Help" icon in the lower left corner of your PKI account.

-

The most-trusted global provider of high-assurance TLS/SSL, PKI, IoT and signing solutions.
-


-
© 2022-2025, DigiCert, Inc. All rights reserved.
Cookie Settings
