
Knowledge Base
How to Create New Profile for “PKI Client Autoenrollment" | PKI Platform
Description

- Login to PKI Manager
- [AD Admin] Create new Test AD Group
- [AD Admin] Add test users to the new Test AD Group
- [PKI Admin] Configure new Authorized User list for new cert profile to use the new Test AD Group. Visit Tasks -> Manage authorized user lists
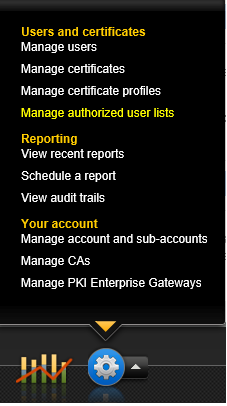
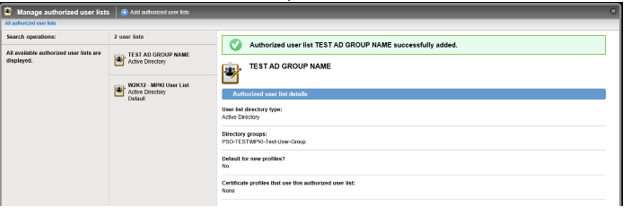
- [PKI Admin] Click on the Add authorized user list link at the top of the window, enter a friendly name for the list and the TEST AD Group value:

- [PKI Admin] Click the Save button. If successful, you will see a new authorized list created:
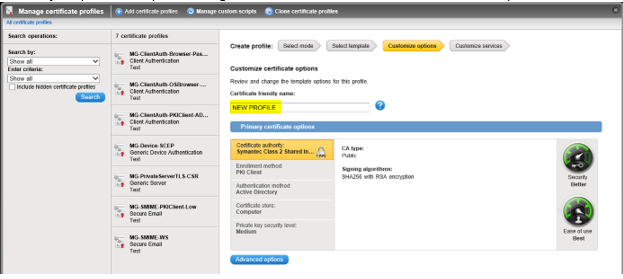
- [PKI Admin] Click on Manage certificate profiles and create a NEW certificate profile by clicking on the Add certificate profiles link at the top of the window, select the Production radio button and the appropriate template.
- [PKI Admin] Enter a new Certificate friendly name and select the NEW CA from the Certificate authority drop-down list (the new DigiCert Public Shared CA or Public Co-branded CA):
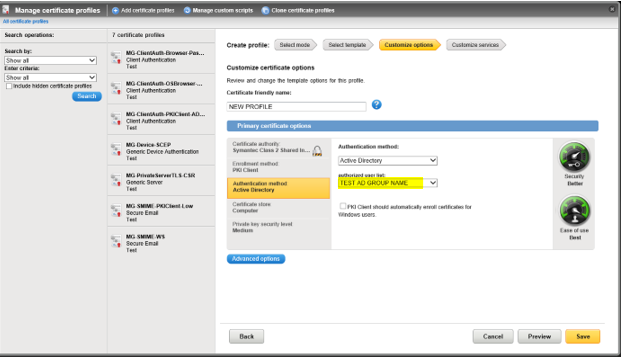
- [PKI Admin] Click on the Authentication method and select the newly created authorized user list from the drop-down list:
- [PKI Admin] Set ALL remaining cert profile options as per your OLD profile and click on the Save button once finished.
- [PKI Admin] If you have any Post-Processing scripts set against the OLD profile, check that it has been automatically set against your NEW profile, by locating the Custom scripts for post processing pane on the right-hand side:

- [PKI Admin] Click on the Edit button > Assign >
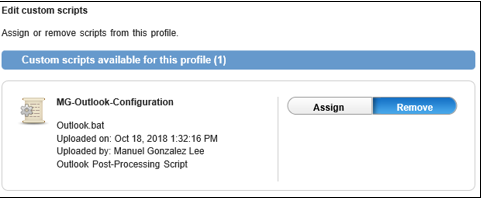
Save - [PKI Admin] If a new script is required, you can upload a new post-processing script by downloading the required script by clicking on the Manage custom scripts located on the top of the window:

- [PKI Admin] Download the required script, change the name and upload it back to the PKI Manager portal.
- [PKI Admin] Click on your NEW profile > click on Edit, under the Custom scripts for post processing pane on the right-hand side > Assign > Save
- [PKI Admin] Check the attribute mapped to Seat ID on the OLD profile matches the one set on the NEW profile, e.g.

- [PKI Admin] If on the OLD profile you customized any of the Email notification templates, replicate the process on the NEW profile

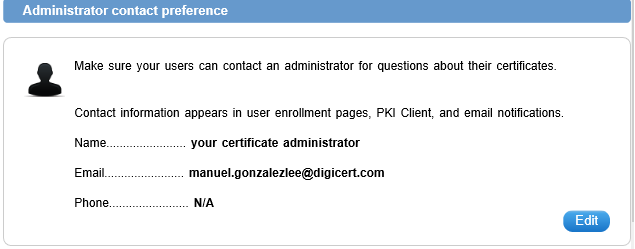
- [PKI Admin] Check the Administrator contact preference details on the OLD profile match the details on the NEW profile:
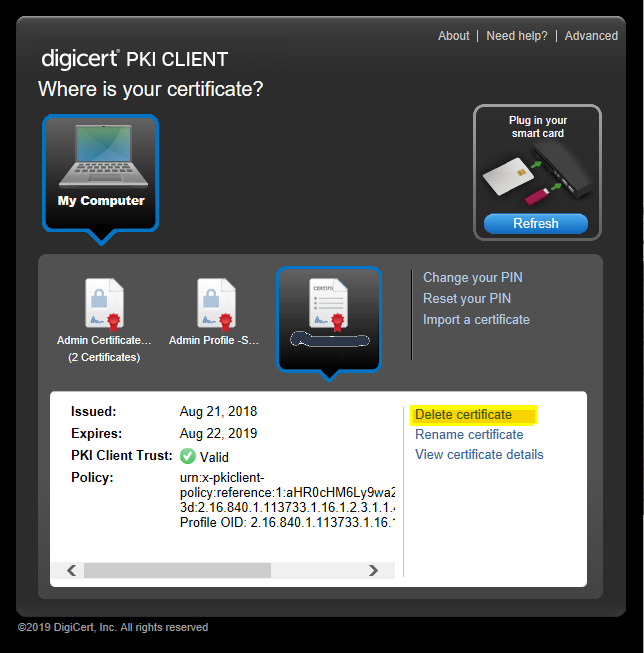
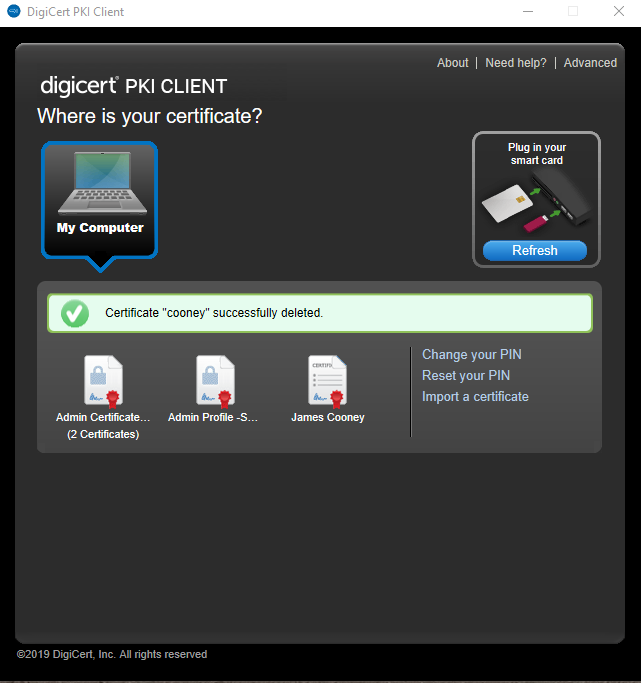
- [Test User] Test issuance of certs via PKI Client using test users belonging to the dedicated Test AD Group. Detailed process steps available upon request, which include Deleting the test cert from the within the PKI Client agent, by launching PKI Client > clicking on Delete certificate:
- [Test User] Ensure you select the “Yes, delete this certificate” checkbox, and you uncheck the “Allow this certificate to be automatically re-enrolled”, so that PKI Client does not renew the test certificates:
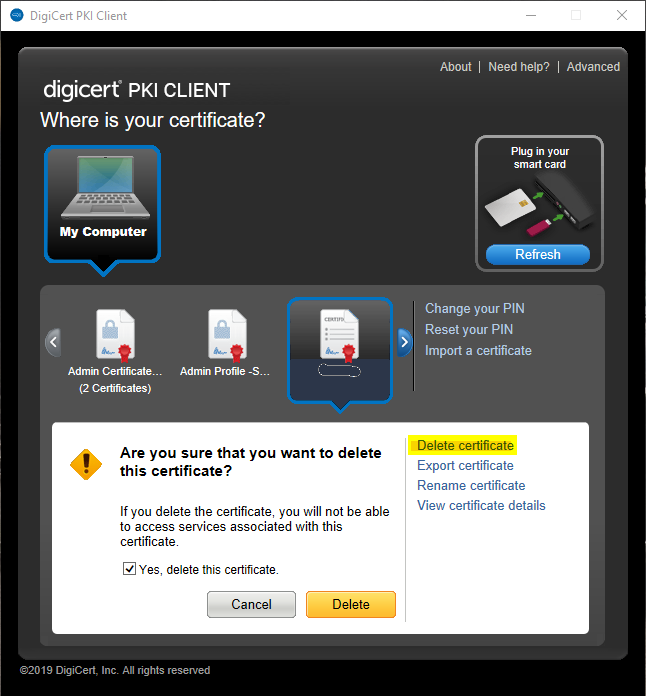
- [Test User] Click the Delete button. If successful, you should get a success message, as follows:
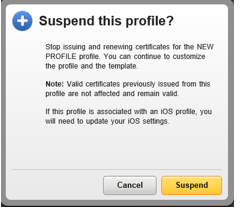
- [PKI Admin] Once tests are successful, SUSPEND the OLD cert profile so that no more certs are issued from it:

- [PKI Admin] Click on the Suspend button:
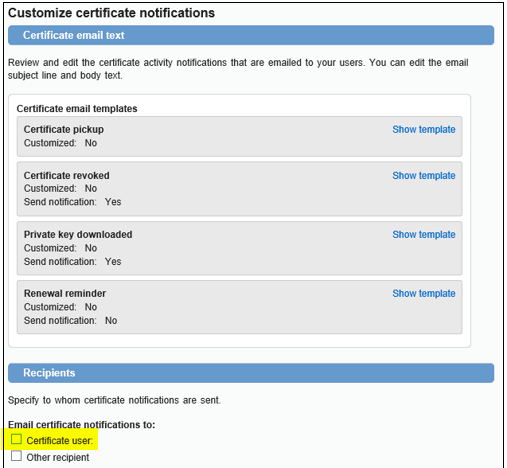
- [PKI Admin] Modify the Email notification setting for Revoked certificates to NOT send email notifications to Users. (this is in case the Admin decides to also DELETE the profile and choose to Revoke all certs).
Click on the OLD certificate profile > under Customize certificate notifications, click Edit > under Recipients, uncheck the Certificate user check box:
- [PKI Admin – OPTIONAL] DELETE the OLD profile by clicking on the Delete profile link and check the “I want to delete this profile and revoke all certificates assigned to it”:
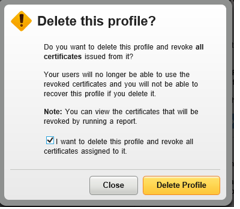
- Click on the Delete Profile button. If successful, you will be presented with a success message showing the Job ID for the bulk revocation asynchronous task, which will run in the background. Once completed, you will be notified via email:

- [PKI Admin] Go live with the NEW cert profile, i.e. associate the full Prod AD User Group to the NEW cert profile (simply copy details from OLD authorized user list)
If you have issues performing these steps, please contact DigiCert PKI Support.

