- Contact Us
-

choose your language
-

Knowledge Base
Installation Instructions for F5 BIG-IP version 11.x
This article provides installation instructions for F5 BIG IP 11.x. If you are not able to perform the steps on your server, DigiCert recommends to contact the server vendor or the organization which supports F5.
Step 1. Obtain the SSL Certificate
- Log into your CertCentral account. Enter in your Username and Password.
- Click Sign In.
- From the list, select the corresponding certificate to download.
- Under Available Actions in the bottom section, click on Download your certificate.
- Confirm the certificate details, then click the Get Started button.
- Select the Server platform and Server version from the drop-down menus where the certificate will be installed to.
NOTE: If you are not sure of the server platform, choose Other. This will give you the x.509 version of the certificate. - Click the Download button
- A prompt window will appear to save a .zip file which will contain all necessary certificates and additional documents and/or information for installation.
Step 2. Install the SSL Certificate
- On the left panel, navigate to System > File Management
- Choose SSL Certificate List
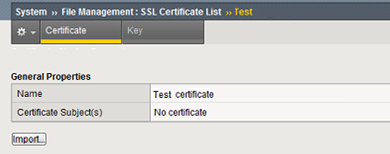
- From the list, click on the pending request (the label from when you generated the CSR)
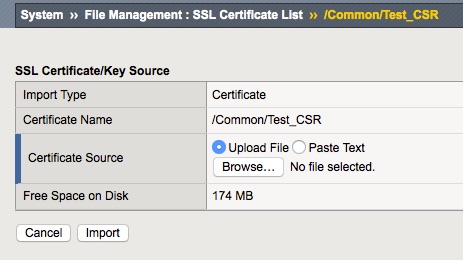
- Click on Import
- Select Upload file
- Click on Browse
- Locate the SSL certificate file then click OK
- Click on Import
Step 3. Download and Import the Intermediate CA certificate
- Download the Intermediate CA certificate from this link: INFO657.
Select the appropriate Intermediate CA certificate for your SSL Certificate type.
NOTE: If you are unsure of which product you have purchased, please review the following knowledge base solution: SO13499. - Copy the Intermediate CA certificate and paste it on Vi or Notepad.
- Make sure there are 5 dashes to either side of the BEGIN CERTIFICATE and END CERTIFICATE and that no white spaces, extra line breaks or additional characters have been inadvertently added.
- Save the file as Intermediate.pem.
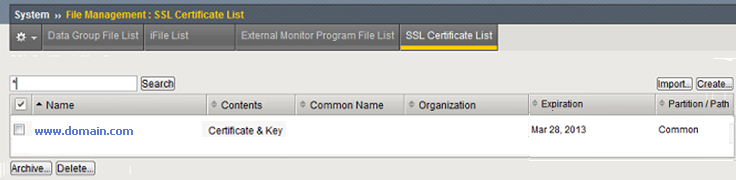
- On the left panel, navigate to System > File Management > SSL Certificate List
- Click on Import (button to the right)
- Select Certificate on the dropdown. Choose Create New and give a name for the certificate in the box below.
- Choose Upload File and click Browse
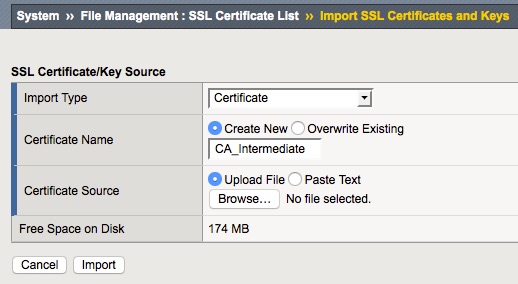
- Locate the Intermediate.pem file then click OK
- Click on Import
Step 4. Updating the SSL profile
- On the left panel, navigate to Local Traffic > Profiles > SSL > Client.
- From the list, select the SSL profile for your website.
- For Configuration, choose Advanced from the dropdown.
- Select from the dropdown the Certificate and Key imported from the previous step.
- Under Chain, select from the dropdown the CA intermediate previously imported.
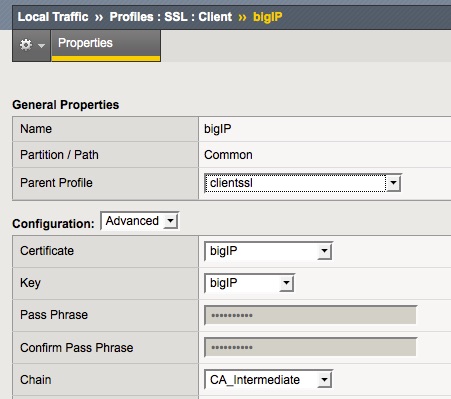
- To apply the changes, scroll down to the bottom of the page and click Update.
- Verify your installation with the DigiCert SSL Tools.
For additional information, refer to F5's KB solution: SOL13302
-

The most-trusted global provider of high-assurance TLS/SSL, PKI, IoT and signing solutions.
-


-
© 2022-2025, DigiCert, Inc. All rights reserved.
Cookie Settings
