
Knowledge Base
How to Import Intermediate and Root Certificates using MMC
Importing Intermediate & Root certificates through MMC (Windows Microsoft Management Console).
Import Intermediate Certificate using MMC
- Open MMC
To open MMC (Microsoft Management Console), go to Run (Win+R), type mmc & click OK

- Access Add or Remove Snap-Ins
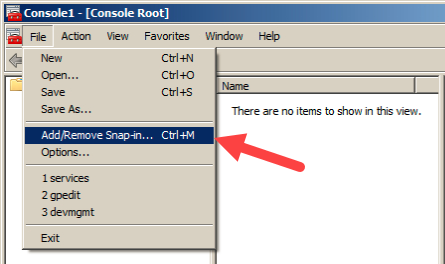
In MMC, click on File & select the option Add/Remove Snap-in
- Select Add
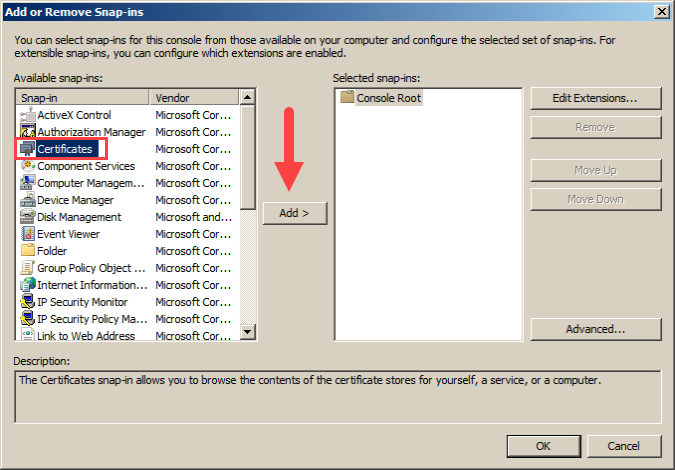
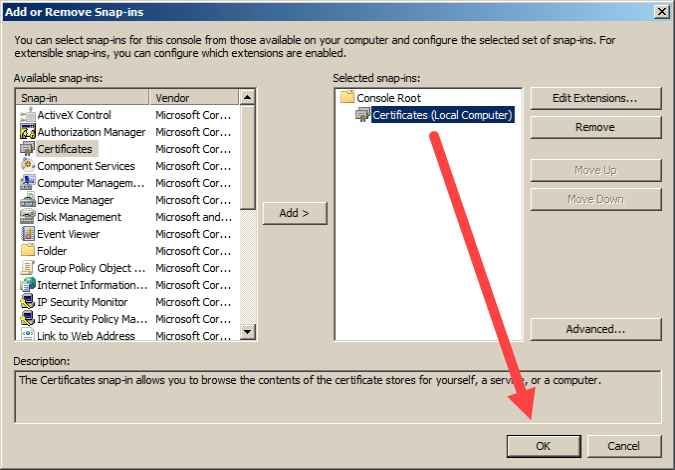
In the window “Add/Remove Snap-ins,” select the ‘Certificates’ option and click on the ‘Add’ button
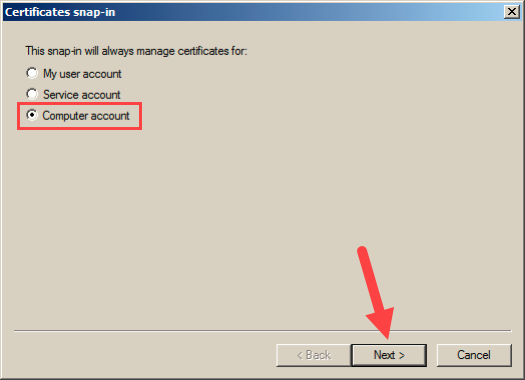
- Select “Computer Account”
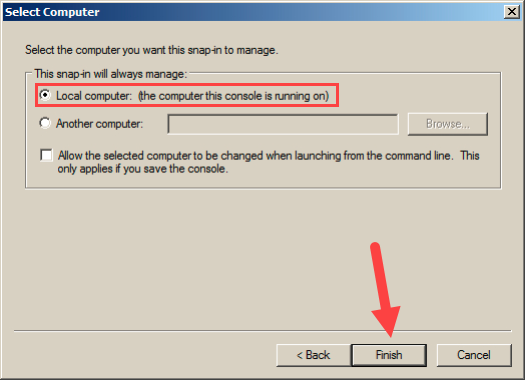
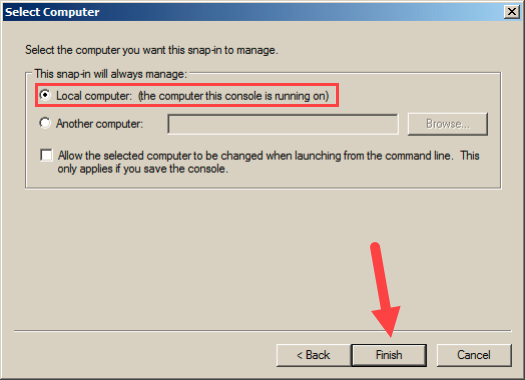
- Select “Local Computer”
This will indicate what the snap-in will manage
- This will select “Certificates (Local Computer)” automatically. Click ‘OK’ to add in console
- Importing the intermediate certificate
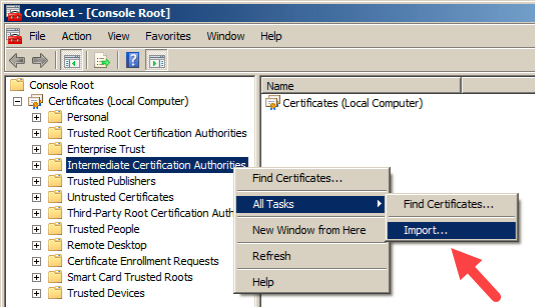
For importing the Intermediate Certificate, right click on the ‘Intermediate Certification Authorities’ and then go to All Tasks > Import

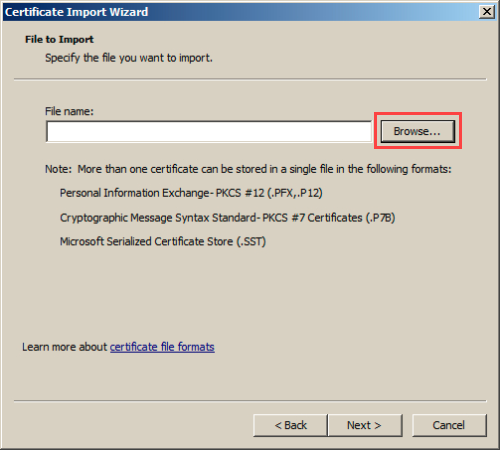
- Locate your Intermediate in the Certificate Import Wizard
Browse for your Intermediate Certificate on your Machine. Click on Next
- Automatically select the certificate store based on the type of certificate.
You will be prompted to the window where you can place the certificate in Certificate Store. Leave without making any changes. If you have PKCS7 file with several certificates in it, you can go with ‘Automatically select the certificate store based on the type of certificate.’ Lastly, click on Next.
- Finish
Click Finish, as certificate has been imported

Import Root Certificate using MMC
To import Root Certificates through MMC (Windows Microsoft Management Console), you must go through same process. Instead of right-clicking on “Intermediate Certification Authorities,” right-click on the “Trusted Root Certification Authorities” and go to All Tasks > Import. The rest of the steps (steps 8 – 10) are the same for Root certificate.
Note: the MMC is only needed when the trusted root certificates were not included in console or were deleted or removed.

