- Contact Us
-

choose your language
-

Knowledge Base
Cisco ASA 5520 I SSL Certificate Installation
Create Trustpoints for Each Certificate Being Installed
If you have not yet created a Certificate Signing Request (CSR) and ordered your certificate, see SSL Certificate CSR Creation for Cisco ASA 5500 VPN.
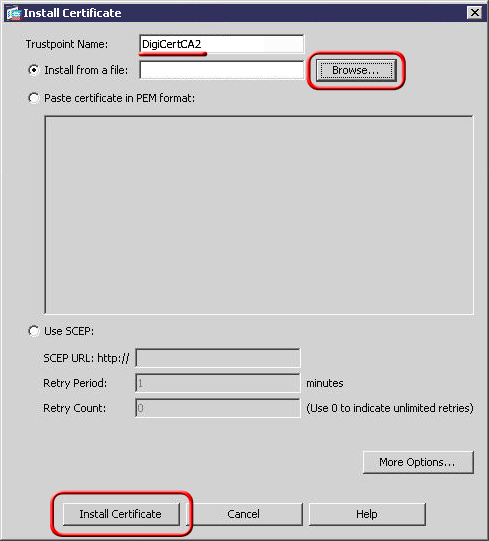
As a way of helping you to manage the certificate chain that will be sent out to clients, you are required to create a trust point for each certificate in the chain that is sent out. You will first need to create trustpoints for the two intermediate certificates DigiCertCA2.crt and DigiCertCA.crt
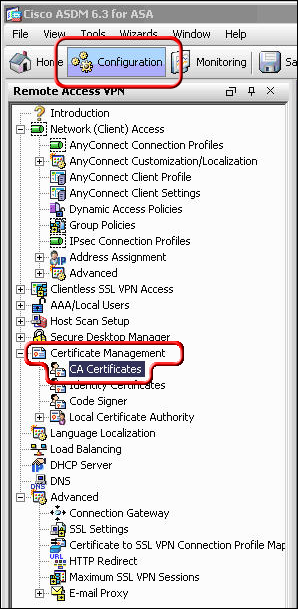
Open the Cisco ASDM, under the Remote Access VPN window pane, in the Configuration tab, expand Certificate Management, and click 'CA Certificates'.
Click the 'Add' button.

Assign a 'Trustpoint Name' to the certificate (e.g. DigiCertCA2), and select the 'Install from a file' Radio Button and browse to DigiCertCA2.crt. Then click 'Install Certificate'.
Then repeat this process of adding a new trustpoint and installing the certificate file for 'DigiCertCA.crt'.
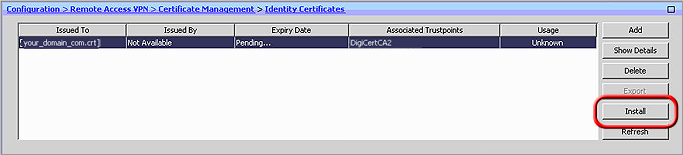
You should then see the Certificate listed with the Trustpoint Name you assigned to it.Under Remote Access VPN, expand 'Certificate Management' to 'Identity Certificates'.
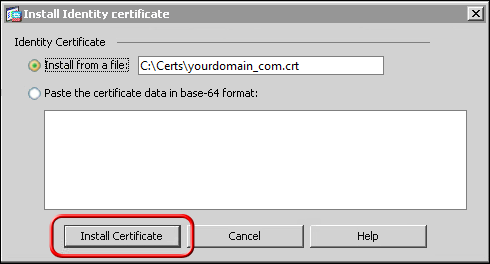
Select the identity you created for the CSR with the 'Expiry Date' shown as pending, and click Install. Then select yourdomaincom.crt and click Install ID Certificate File. Once installed, the Expiry Date will no longer show 'Pending'.
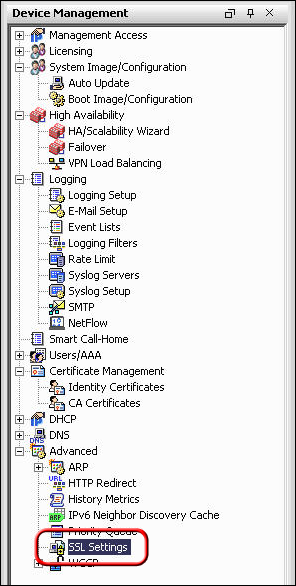
The certificate now needs to be enabled. On the lower left, click Advanced > SSL Settings. Then, select the interface you want SSL enabled for and click Edit.
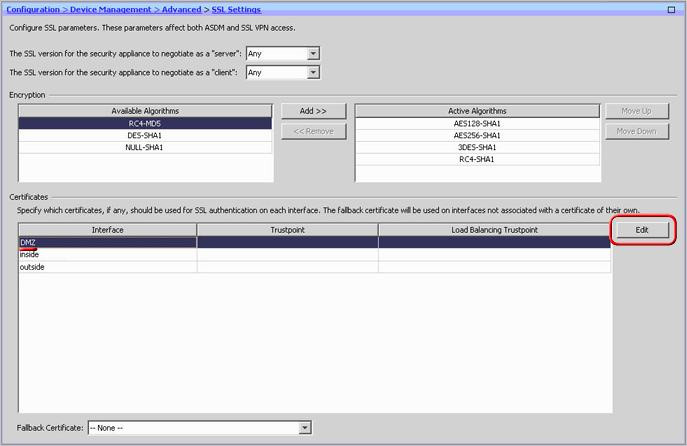
On the next screen, click the drop-down menu and for Primary Enrolled Certificate, select your certificate and click Ok.
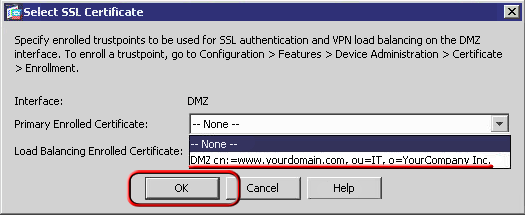
The ADSM will then show your certificate details under the trustpoint.
-

The most-trusted global provider of high-assurance TLS/SSL, PKI, IoT and signing solutions.
-


-
© 2022-2025, DigiCert, Inc. All rights reserved.
Cookie Settings
