- Contact Us
-

choose your language
-

Knowledge Base
How to sign a document in Adobe Acrobat
Signing
- Open or create your document in Adobe Acrobat.
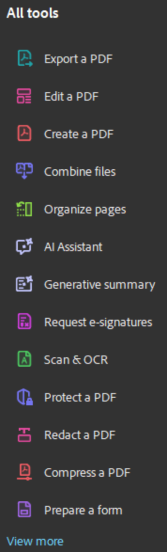
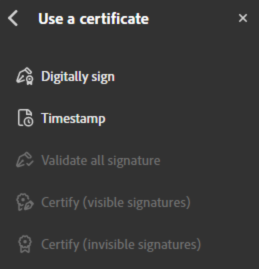
- From Acrobat home (on the left), select All tools > View more > Use a certificate > Digitally sign.
- Click and drag the mouse in the area the signature should appear.
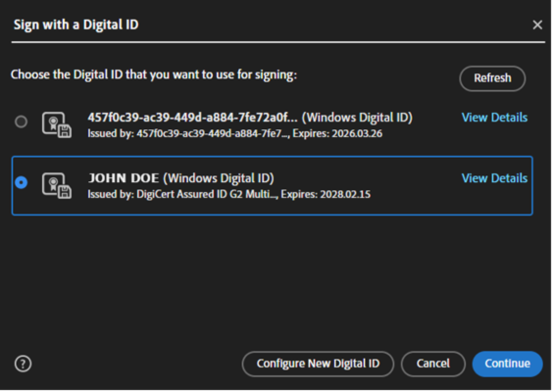
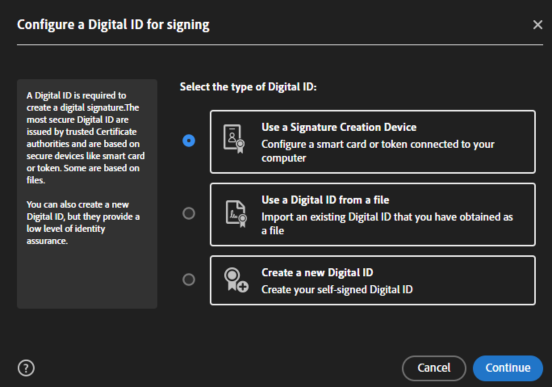
- A window will appear to select, create, or import the certificate (Digital ID) the signature will use. Adobe will automatically pull certificates installed to the system. If it is missing, the “Configure New Digital ID” can be used to import the certificate.
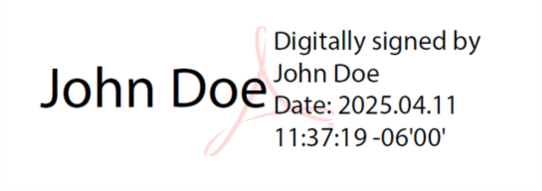
- Review and modify the appearance of the Digital ID as desired
a:(Optional) New appearance presets can be created and edited for this Digital ID
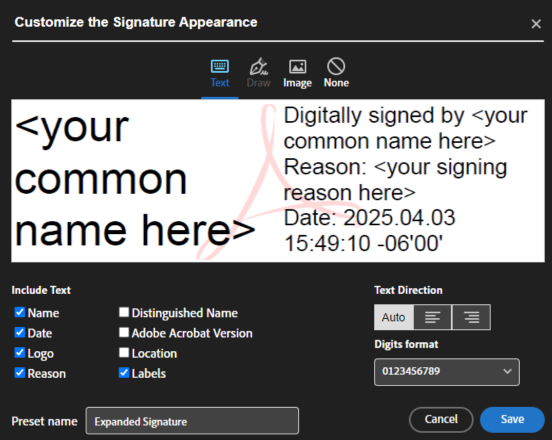
b:(Optional) The document can be locked after signing.
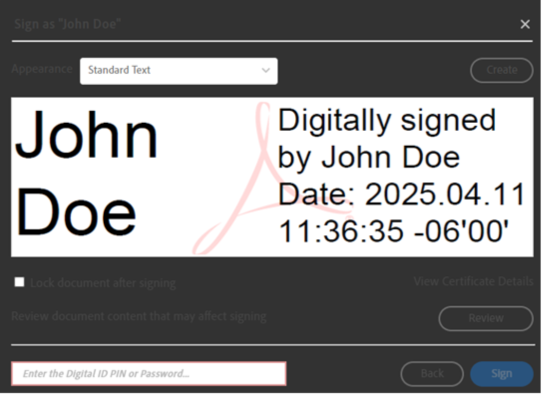
- A dialog box will appear to select the location where the signed document will be saved.
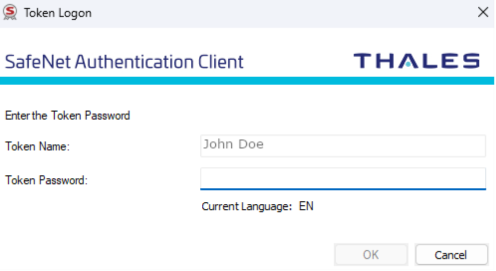
- The PIN or password requested is the “Token Password.” This is required to sign and then save the document.
- This file can now be sent as desired.

Creating a Digital ID
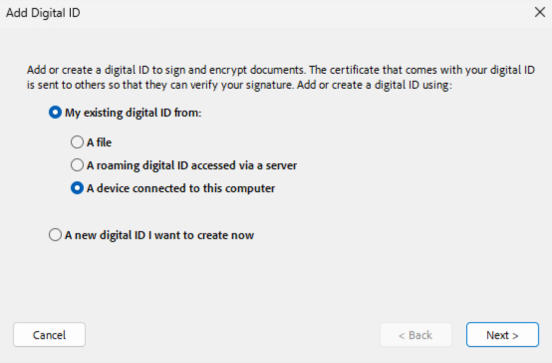
- From step 4 in the previous section, select the option to create a new Digital ID if needed.
- Select the Digital ID Type:
a. eToken Certificate: Use a Signature Creation Device. This method will be used as an example.
b. Normal Certificate: Use a Digital ID from a PFX file. The document signing certificates trusted by Adobe are not normally provided or stored in a format that would allow the use of a PFX.
- Ensure the token or certificate is on the machine.
- Continue through the wizard until the option appears to select the desired certificate. The PIN or password requested is the “Token Password,” just like it is for signing.
- Configure the appearance of the signature as desired.
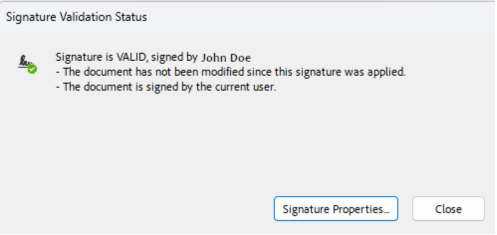
- Sign
Timestamping
This allows the signature to remain valid even after the certificate that was used to sign the document has expired.
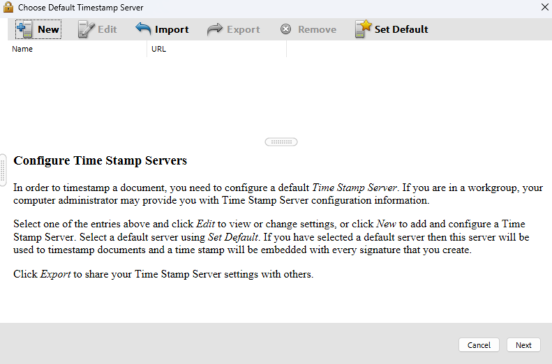
- Under the ‘Use a certificate’ tool, select the ‘Timestamp’ option.
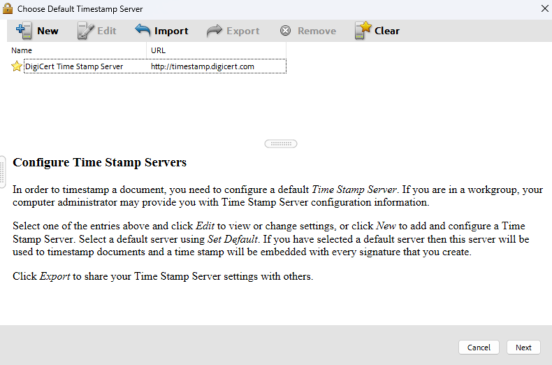
- If a timestamp server has not been configured, you will need to add a new server in the window that appears.
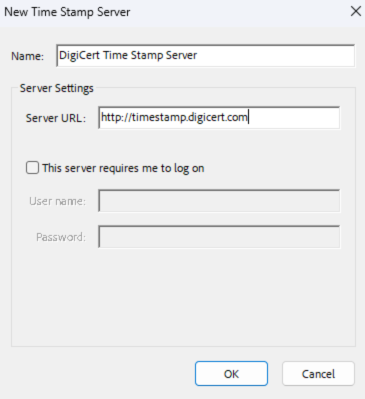
- Provide a name and the URL to access the timestamp server. For the DigiCert timestamp server, please use the following URL: http://timestamp.digicert.com
- Now that the server has been added, it should appear in the list
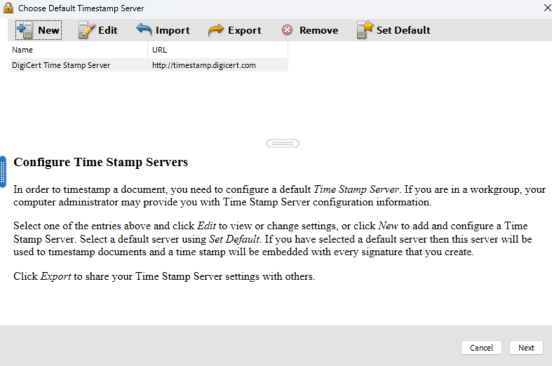
- A default timestamp server is required to timestamp the document. This can be done by selecting the desired server and using the “Set Default” button. The server will now have a star icon.
- Rename and save the document as desired
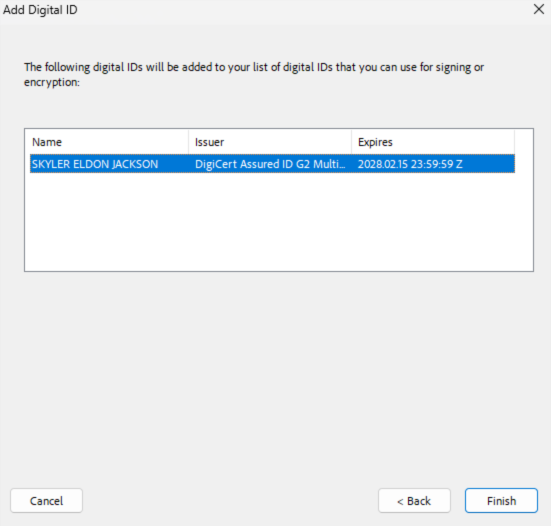
Alternate Digital ID Method
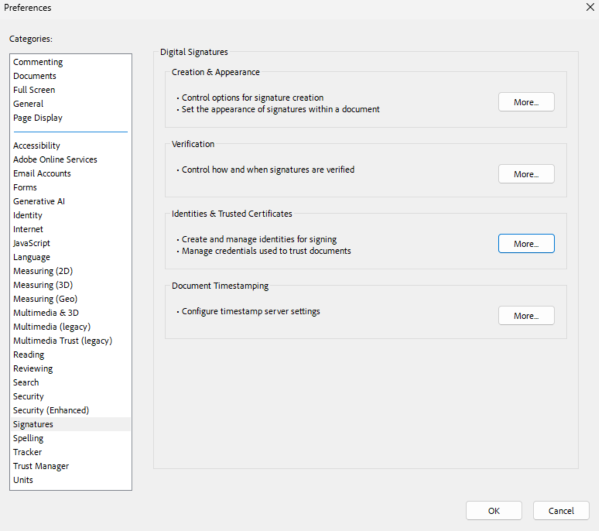
- Menu > Preferences > Signatures > Identities & Trusted Certificates > More...
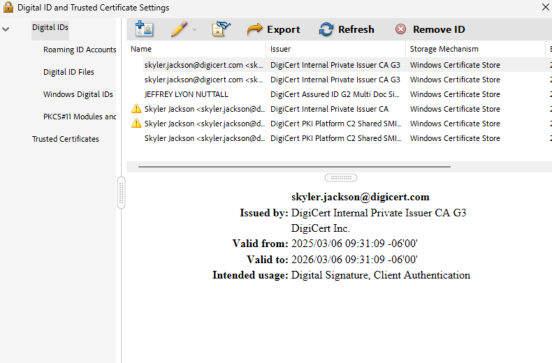
- In the top left corner, use the “Add Digital ID” Icon to open the wizard.
- Complete the wizard
- If a PIN or password is requested, this is the “Token Password.”
Adobe Documentation
https://helpx.adobe.com/acrobat/using/certificate-based-signatures.html
https://helpx.adobe.com/acrobat/using/digital-ids.html
-

The most-trusted global provider of high-assurance TLS/SSL, PKI, IoT and signing solutions.
-


-
© 2022-2025, DigiCert, Inc. All rights reserved.
Cookie Settings
