- Contact Us
-

choose your language
-

Knowledge Base
SSL Certificate Installation on a Checkpoint VPN
Install SSL onto a Checkpoint VPN Appliance
If you have not yet added a root and intermediate certificate, created a Certificate Signing Request (CSR), and ordered your certificate, see CSR Creation for a Checkpoint VPN Appliance.
Installing the Certificate on the Checkpoint device
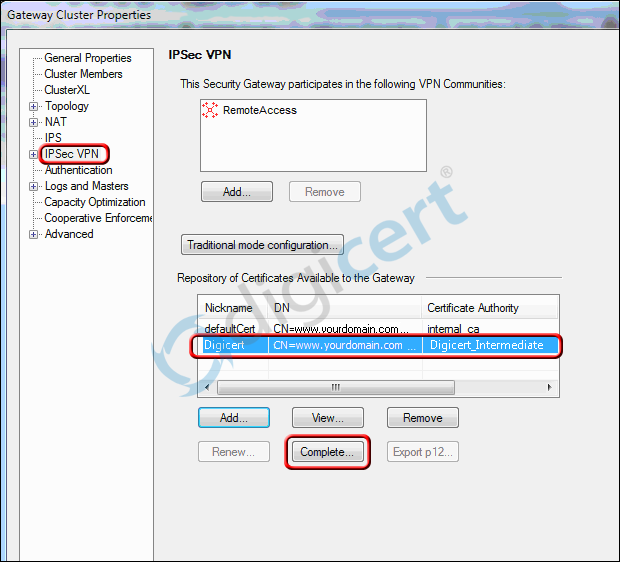
Open the Device you are going to have the SSL Certificate served from, then go to IPSec VPN, click Complete, then find your_domain_com.crt then click Ok.
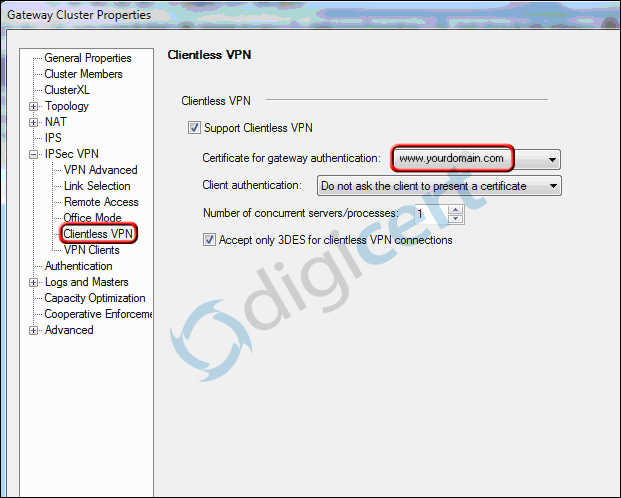
If you are allowing Clientless VPN login, click that option, then select the certificate for this specific gateway (cert nickname).
To allow VPN Client login, click that option under IPSEC VPN, then choose 'SSL Network Extender' and select the certificate by its nickname and click 'Ok'.

Push this policy to devices and clients
Click the Install policies button (next to the green checkmark button above the 'Anti-spam & Mail' tab, and see image below)

Select which Installation Targets the certificate will be sent to.
You can choose to install this certificate on each gateway by clicking the radio button, and as a safeguard, you can click the box to not install it at all if it fails.
To help you track database changes, you can click the checkmark and name the database change, and leave a comment about it.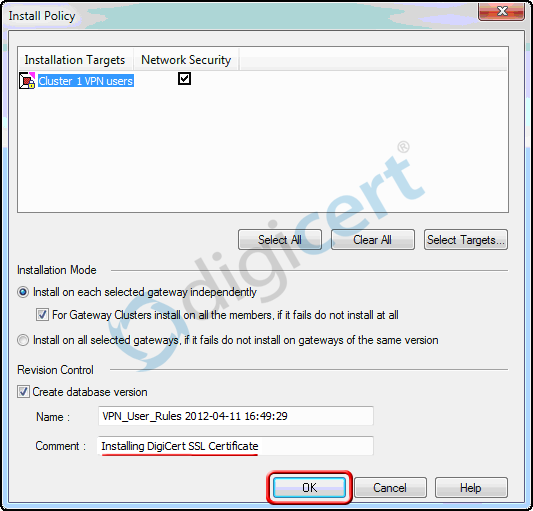
This will reset the settings and push the new policy out to clients.
-

The most-trusted global provider of high-assurance TLS/SSL, PKI, IoT and signing solutions.
-


-
© 2022-2025, DigiCert, Inc. All rights reserved.
Cookie Settings
